How to Tie the Improved Clinch Knot: A Step-by-Step Guide with Photos and Video

The improved clinch knot, sometimes called the fisherman’s knot, is what I’d call a necessary oddball. It’s remarkably easy to tie and comes in handy for a variety of applications. It can essentially be used to attach anything with an eye—from a crankbait to a streamer fly to a barrel swivel—to your line or leader. Even with cold, wet fingers, you can tie an improved clinch in seconds, but I call it odd because the amount of trust anglers put in it varies widely.
The origins of the improved clinch seem unknown, but it’s been in use for more than 100 years. And that’s part of the problem. Today, there are loads of fancier, stronger knots that have become common in fishing. The result is that the improved clinch is often viewed as “juvenile” because if you tie it, you simply don’t know any better knots. I’m here to tell you that’s false. I use this knot all the time, you just have to understand where it shines and where it falls short.
When to Tie the Improved Clinch Knot
The improved clinch works best when tied with monofilament or fluorocarbon line. As it forms, a series of loose wraps cinch down into tight coils that end up jamming against the eye of whatever you’re tying on. During the process, a bit of friction occurs roughening the surface of the line on a near-microscopic level. This, however, gives the line a bit more “bite,” making the knot stronger, not weaker. If tied with slick, thin, modern braided line, on the other hand, under pressure those tight wraps are likely to slip.
I use the improved clinch mostly for targeting fish weighing less than 5 pounds. When tied correctly, it’s a very strong knot. Likewise, I know some seasoned tuna captains that will tie it in fluorocarbon leader testing 60 pounds or more because they trust its strength against fish weighing 100 pounds or better. Regardless of how and when you use it, it’s a useful that all anglers should learn.
How to Tie the Improved Clinch Knot, Step-by-Step
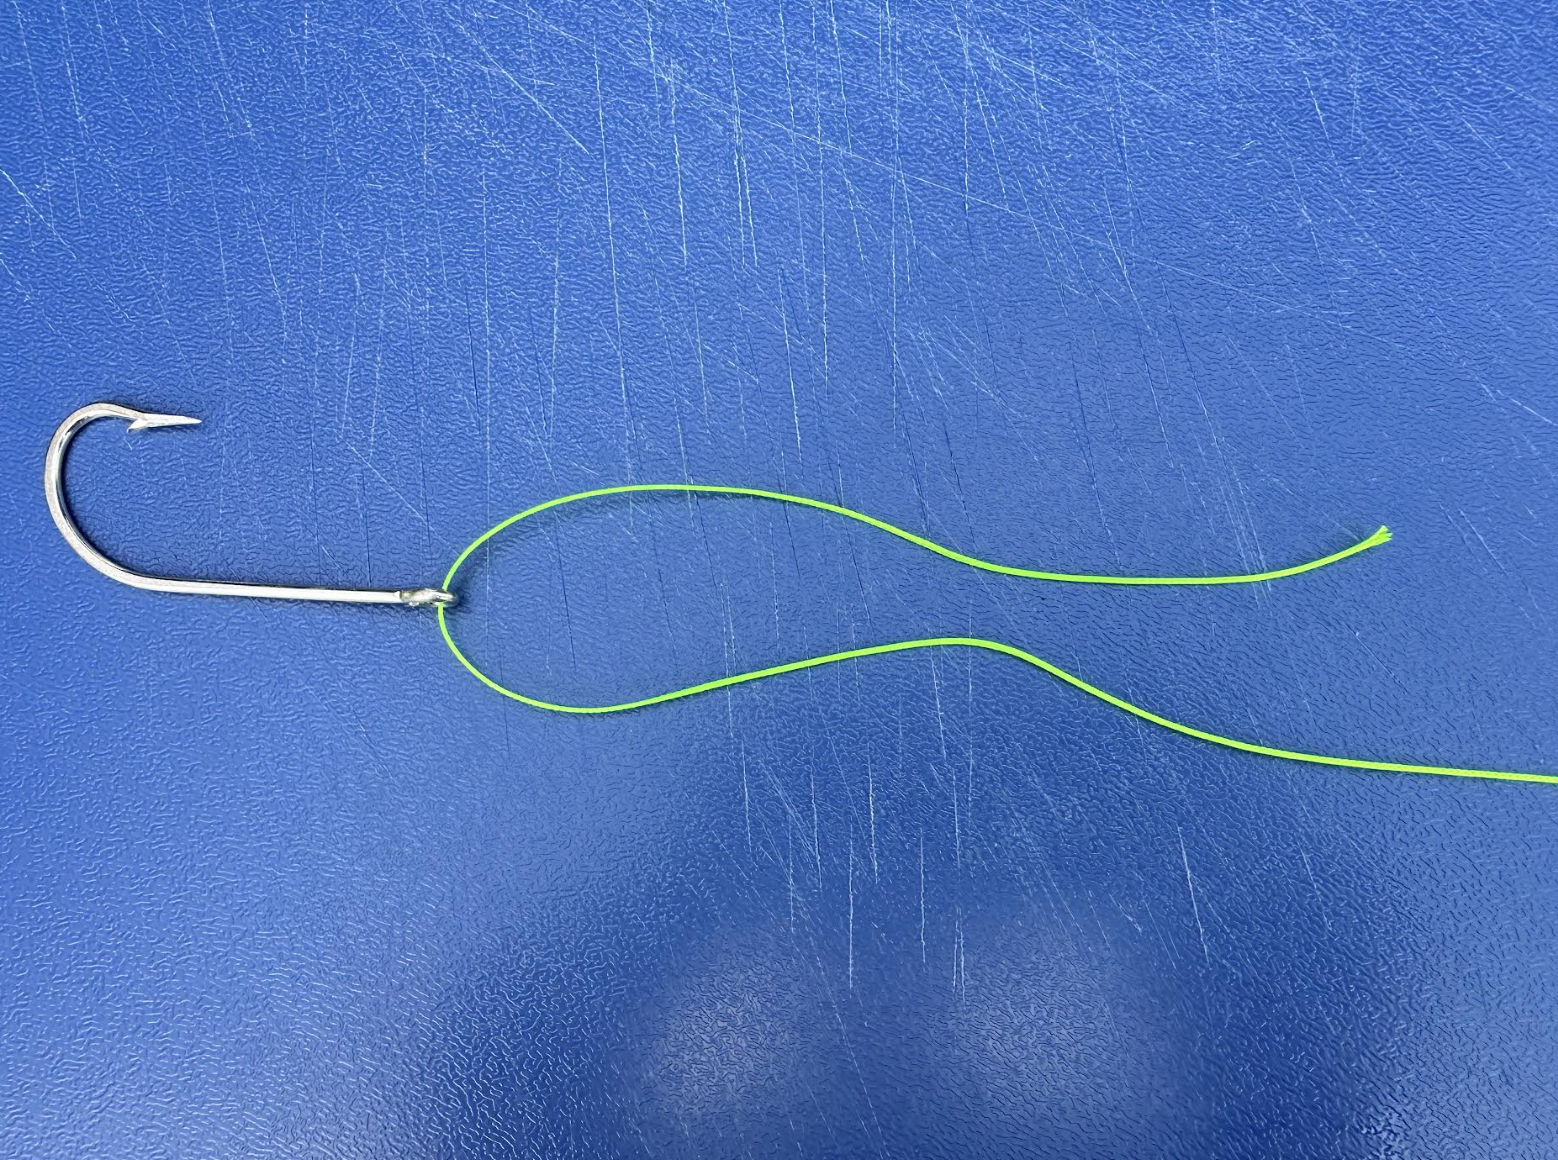
Photo by Joe Cermele
1. Pass the end of your line or leader through the eye of the hook, lure, fly, or terminal tackle you need to secure. You’ll want a good amount of tag end to work with, so make sure the tag measures approximately 3 inches for ultra-light line applications, and 5 to 6 inches when tying with heavier line or leader.
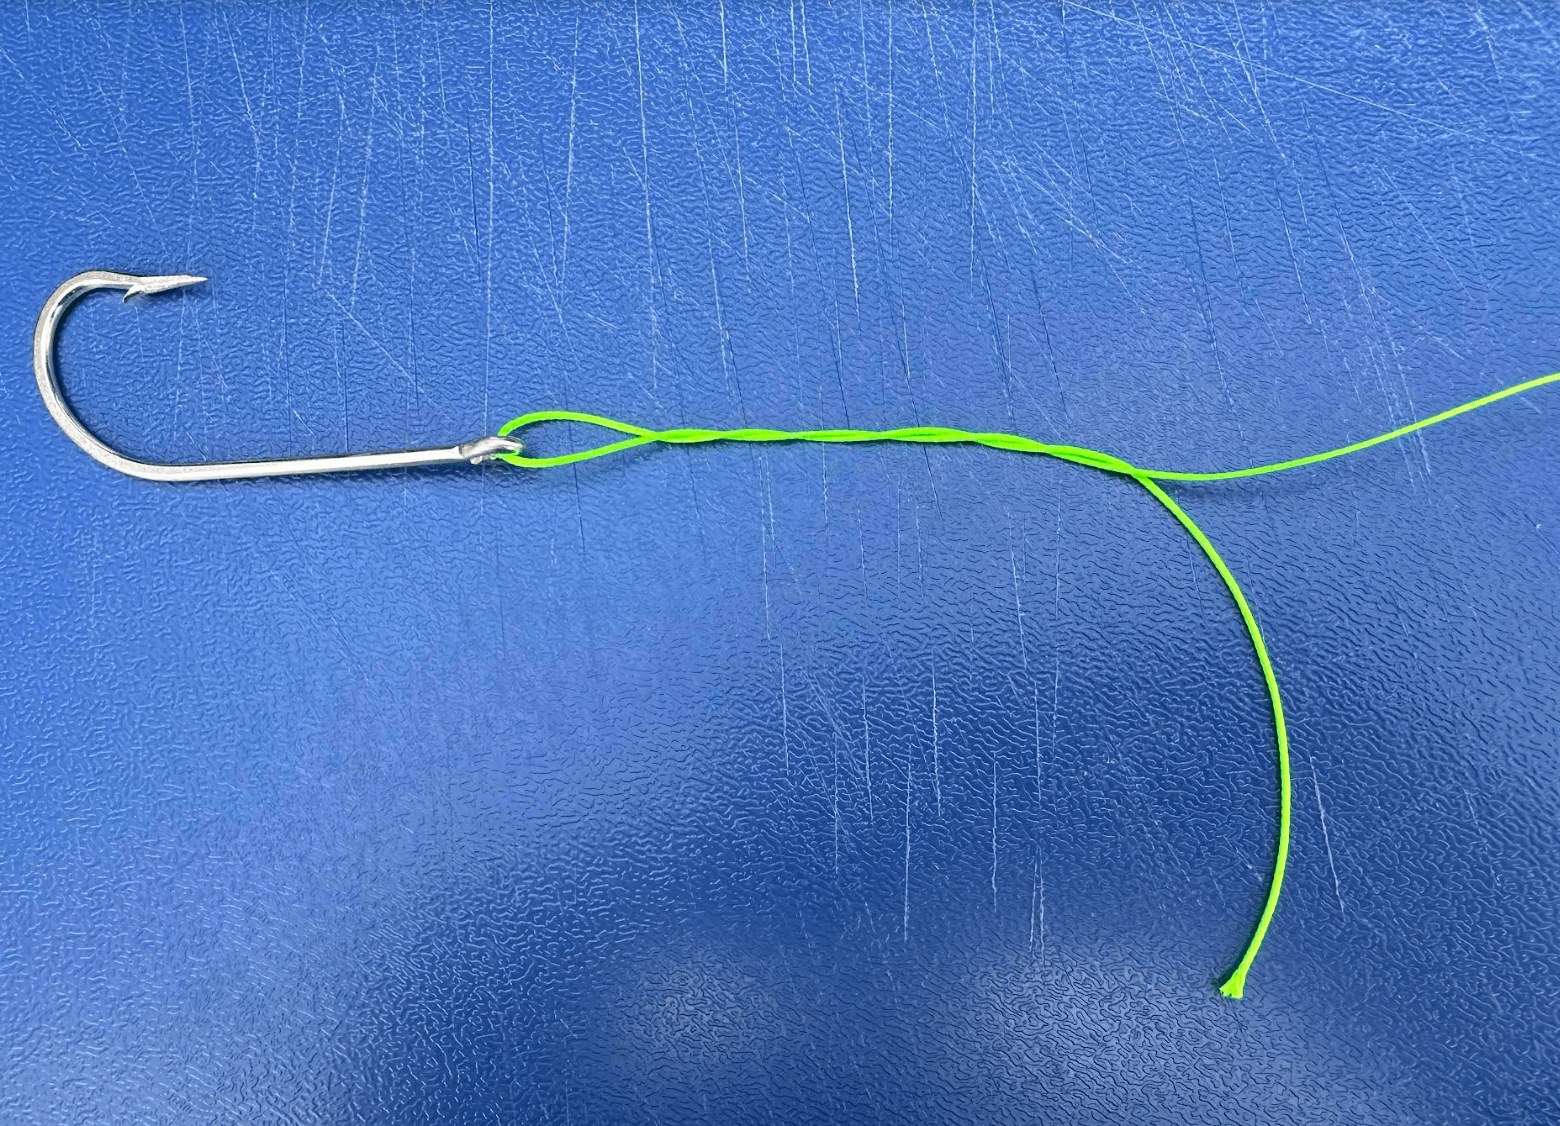
Photo by Joe Cermele
2. Begin winding the tag end around the main line. With heavier line or leader testing 20 to 40 pounds, four wraps will be sufficient. Lines testing more than 40 pounds require only three turns to maintain knot strength. Meanwhile, with lighter, thinner lines testing 10 pounds or less, five to seven turns ensure maximum knot strength.
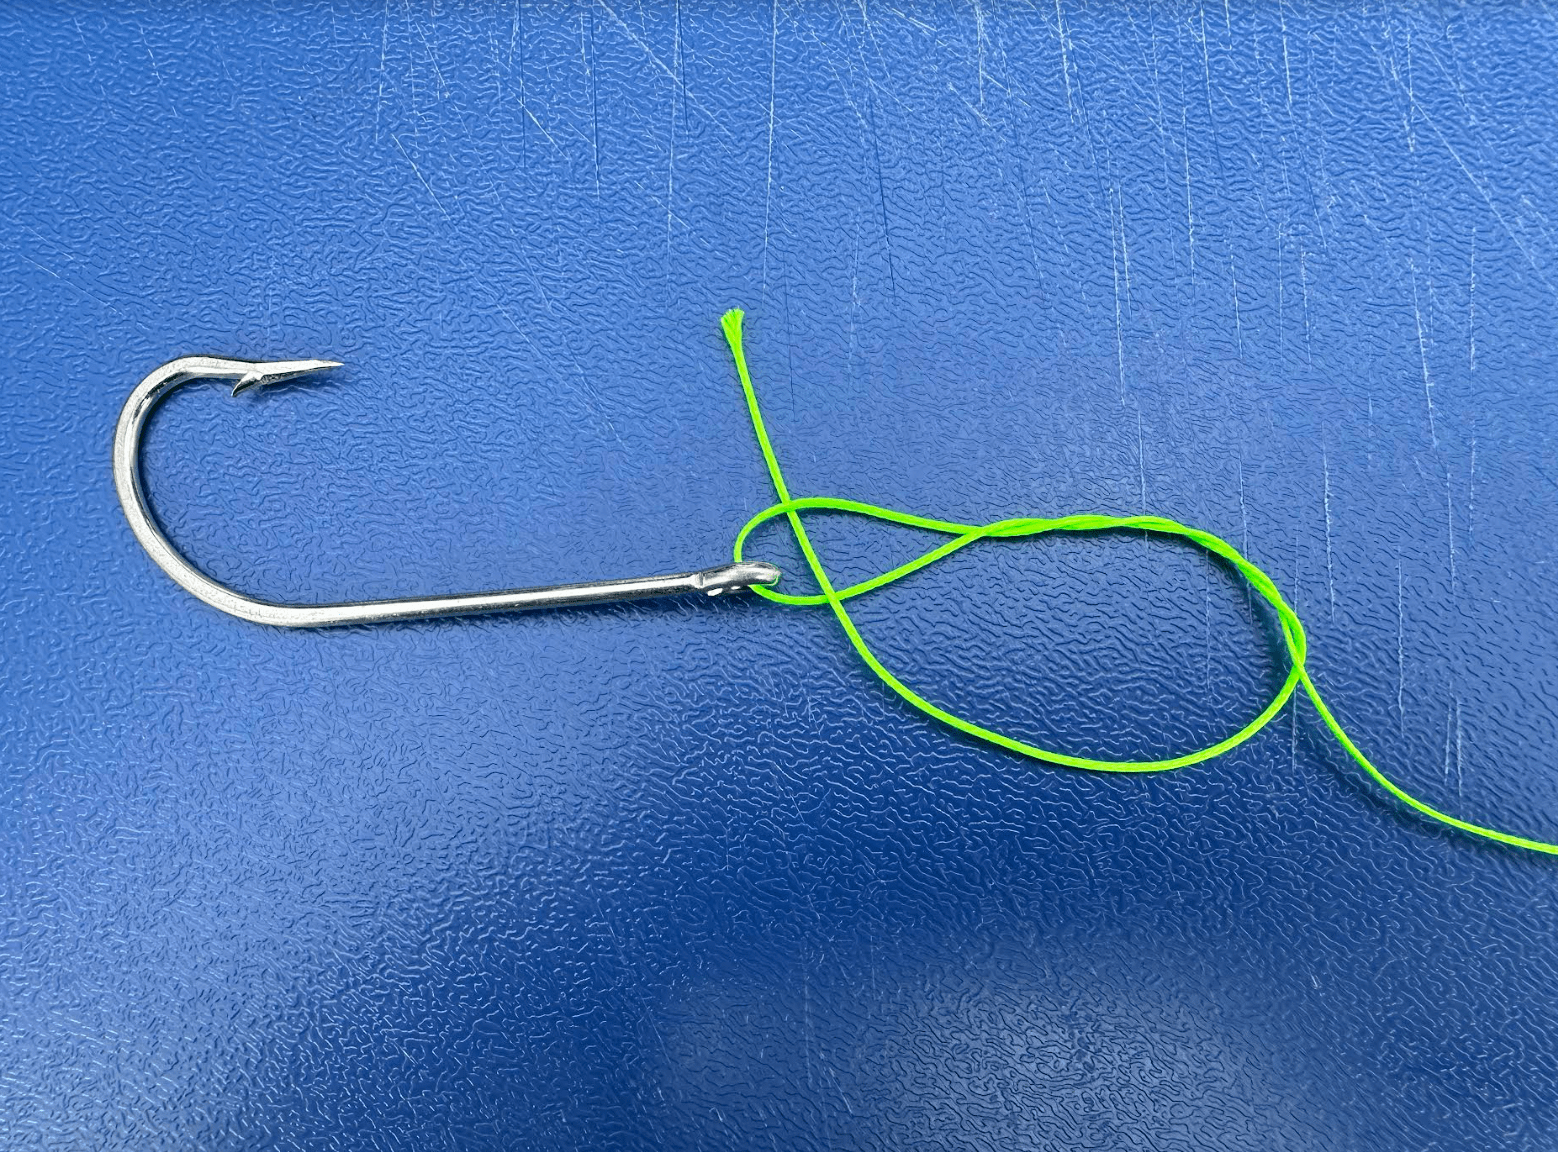
Photo by Joe Cermele
3. Pass the tag end up through the loop created at the eye.
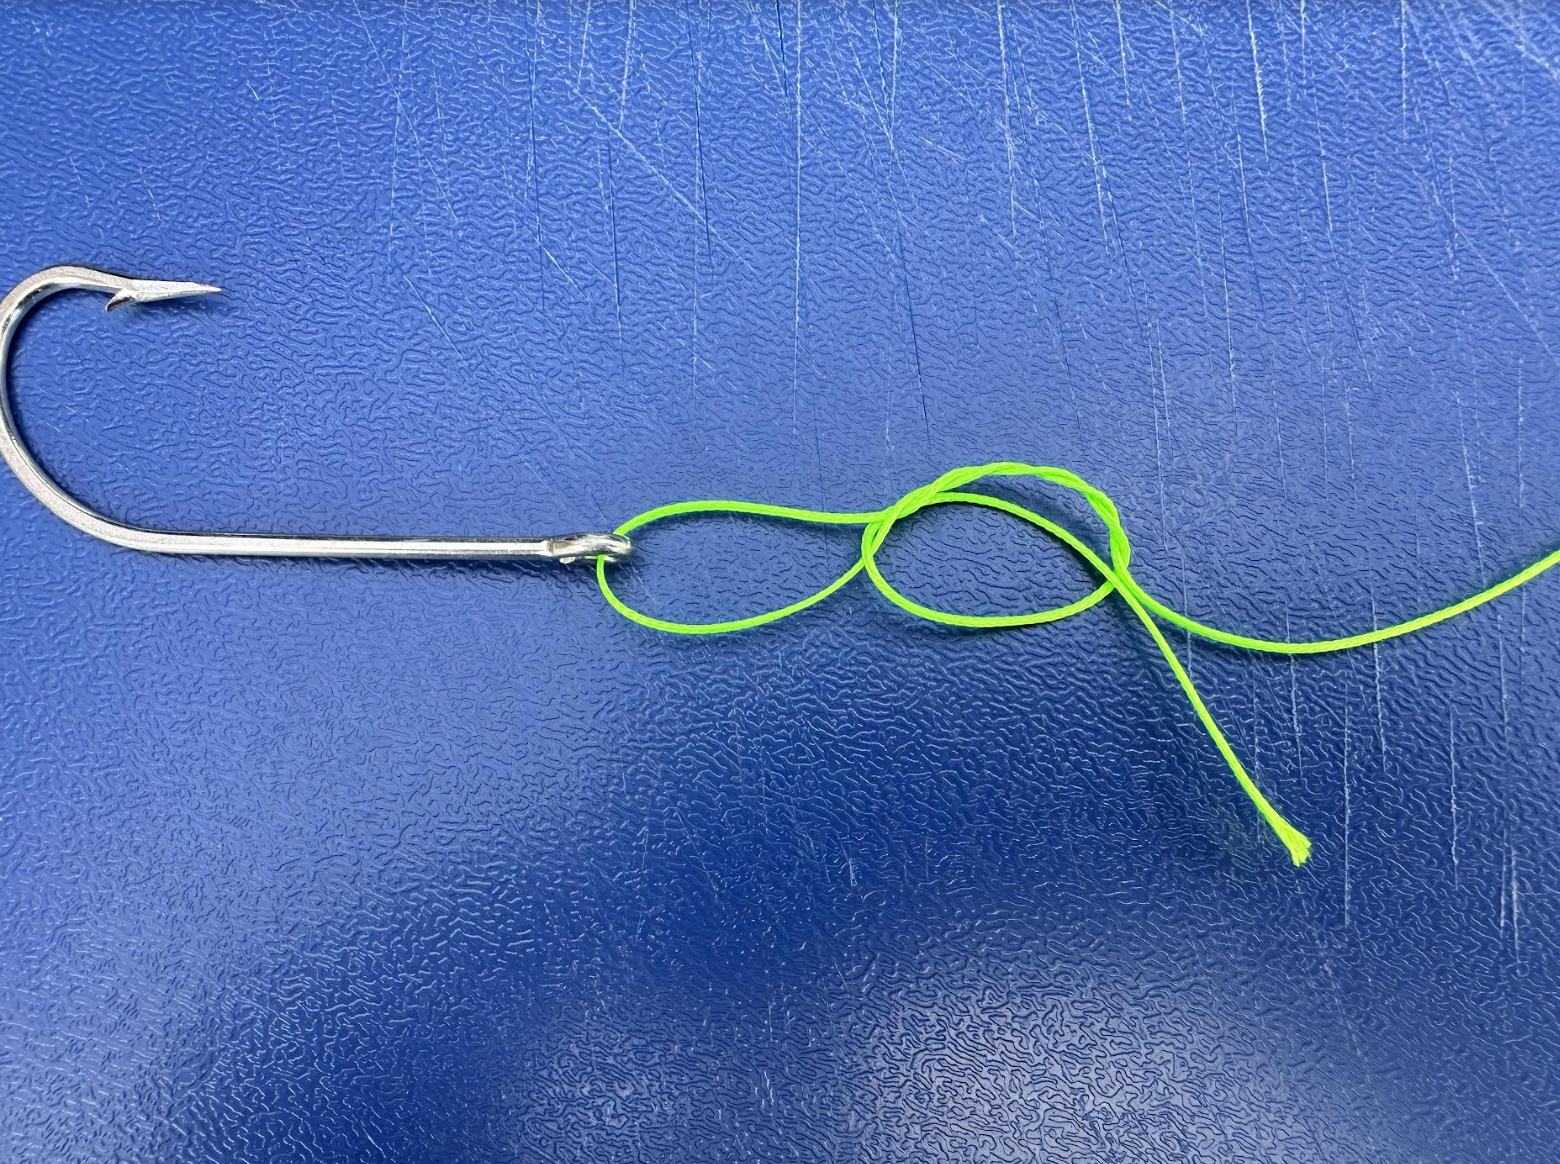
Photo by Joe Cermele
4. Next, pass the tag end through the larger loops that’s now been created between the wraps and the tag end itself.
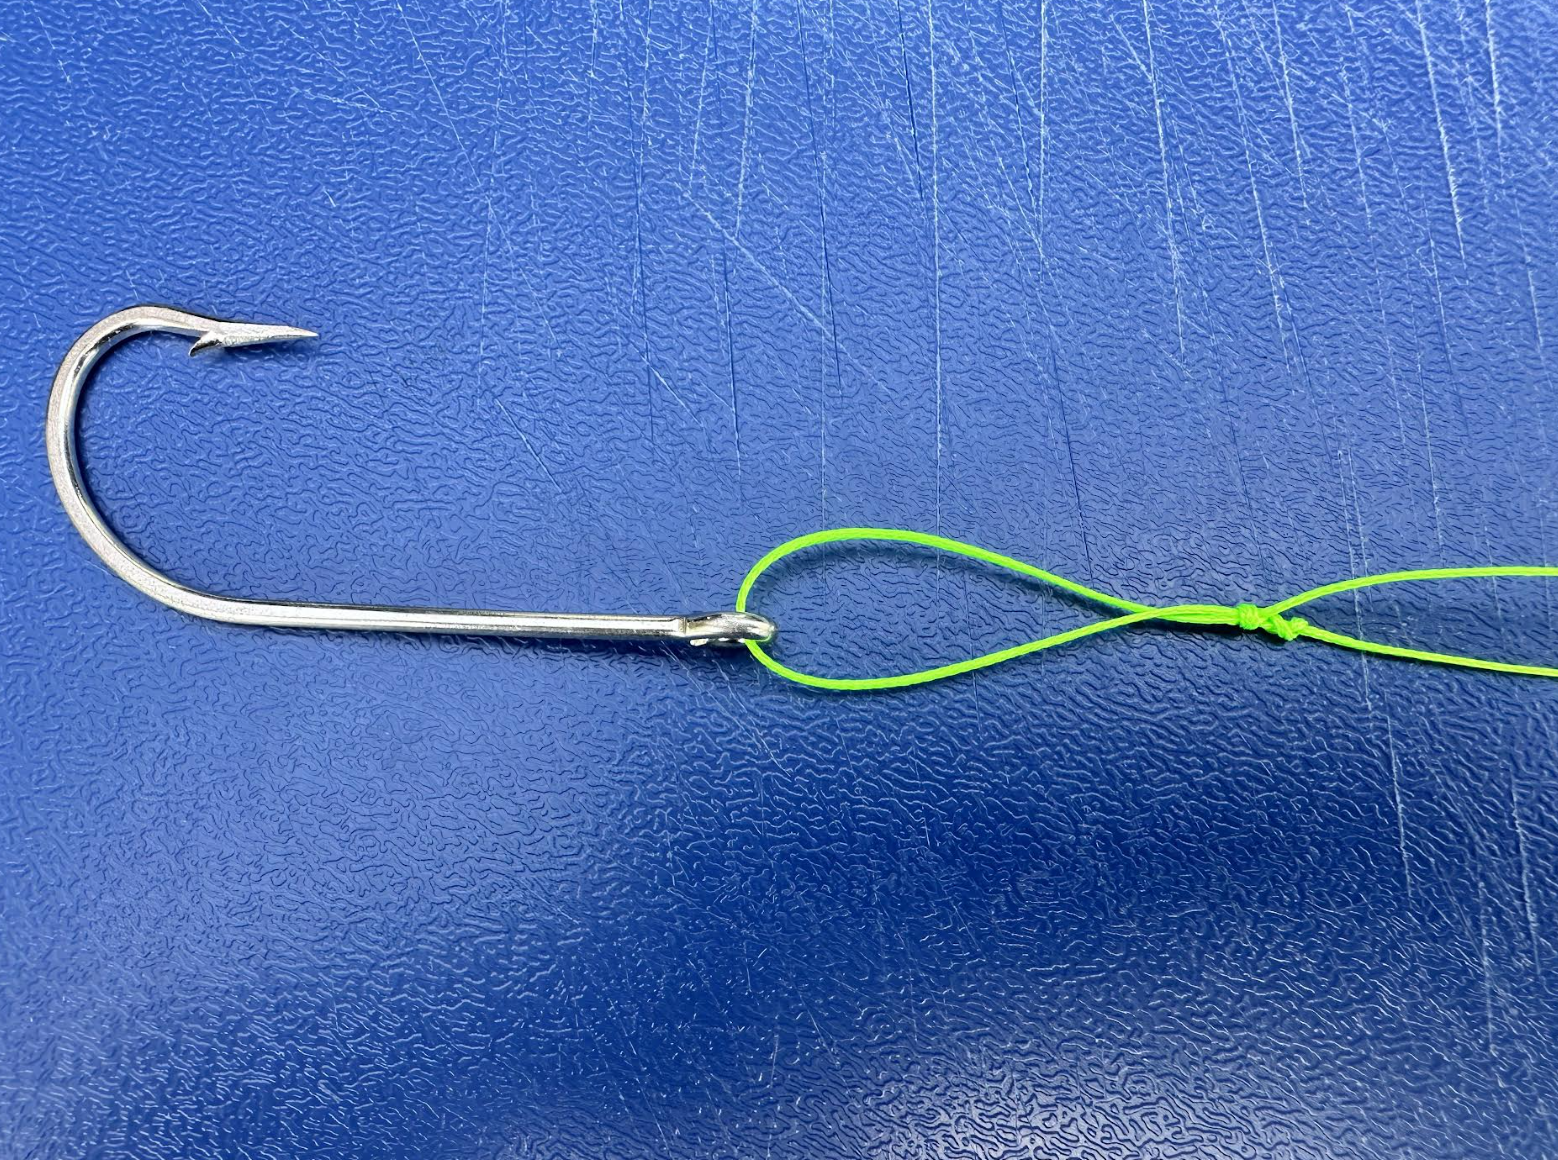
Photo by Joe Cermele
5. While pinching the wraps in your fingers, pull the tag end slowly. The wraps will form a series of tight coils and cinch down around the main line.
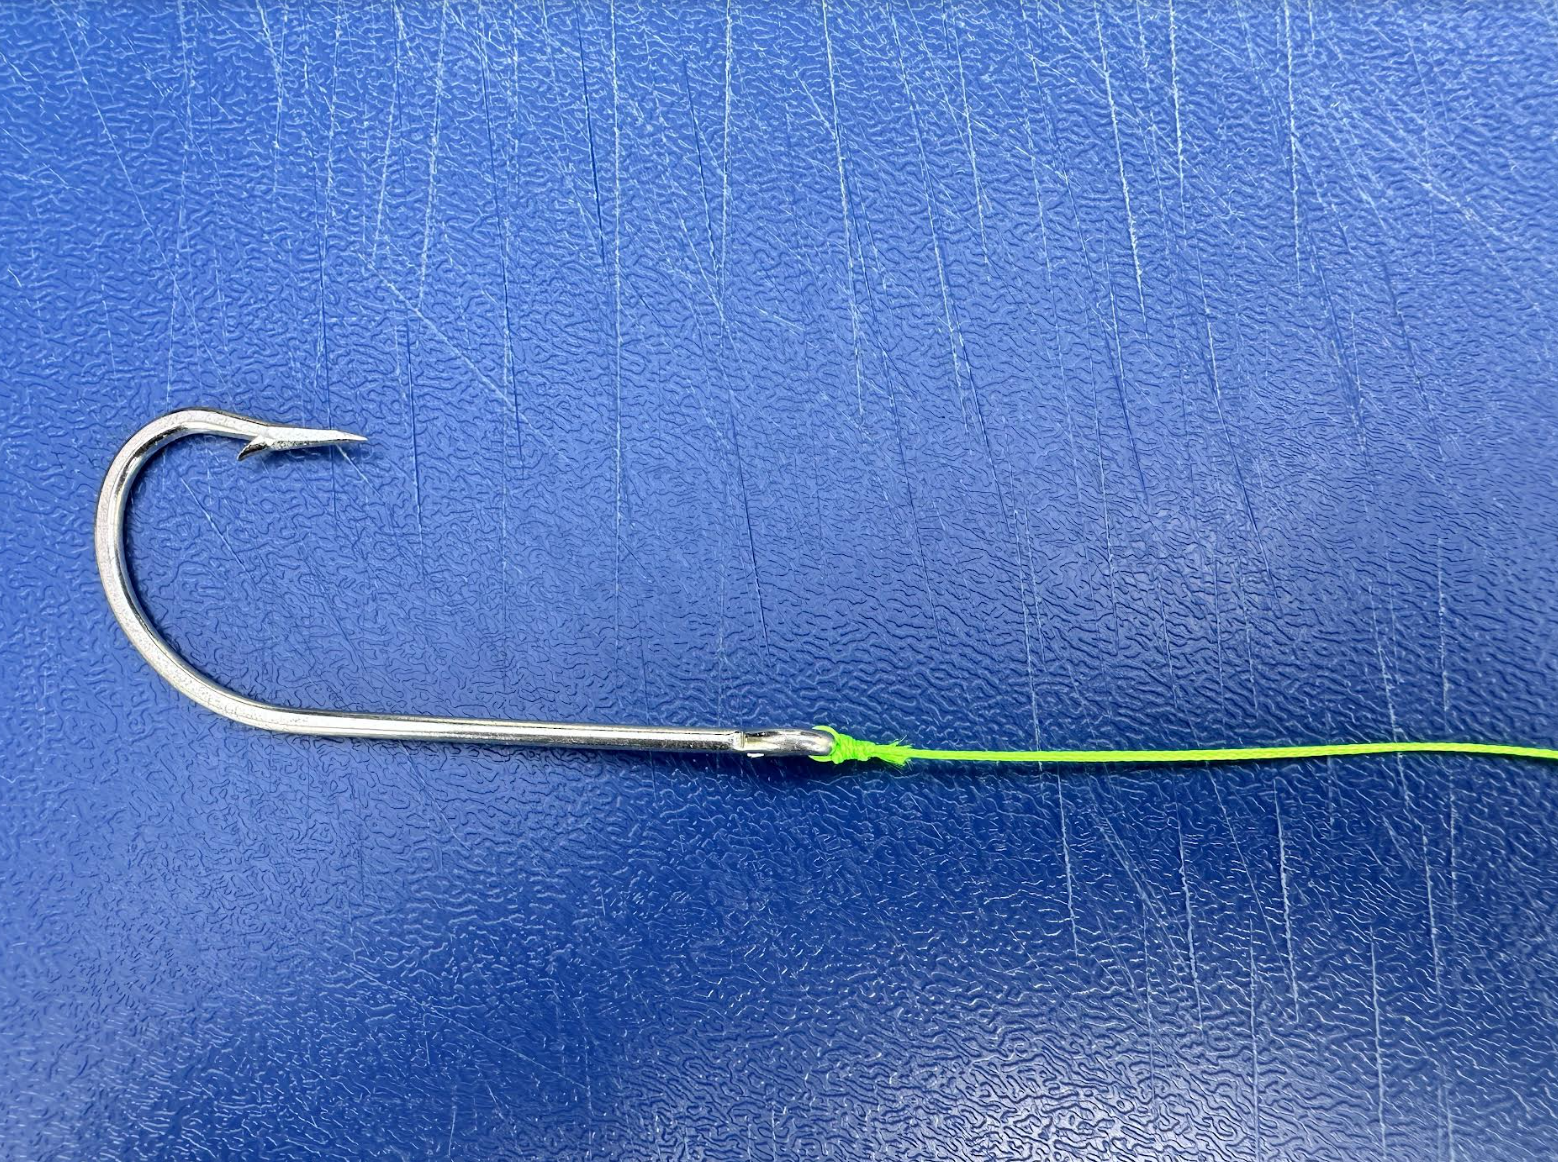
Photo by Joe Cermele
6. Wet the cinched coils with a bit of saliva. Now, pull the main line sharply away from the hook, lure, fly, or terminal tackle. The coils will slide down and jam tightly against the eye. Trim the tag end close to the wraps.
Read Next: How to Tie a Fishing Knot: The 9 Best Knots for Fishing
What About an “Unimproved” Clinch Knot?
For something to be “improved,” some part of it needed fixing, and that applies to this knot. The plain, old clinch knot has been around longer than the improved clinch, and the only difference between the two is step four in the process outlined above. Instead of passing the tag end back through the larger loop, you simply pass it through the loop at the eye one time and cinch the knot tight. Most anglers agree the improved clinch is better because the pass through the secondary loop makes it more difficult for the knot to slip. However, our angling forefathers did just fine landing trout and bass with an “unimproved” clinch knot, so if you want to form this knot even faster, skip step four if you dare.
The post How to Tie the Improved Clinch Knot: A Step-by-Step Guide with Photos and Video appeared first on Outdoor Life.
Source: https://www.outdoorlife.com/fishing/improved-clinch-knot/