How to Grip a Compound Bow for Better Hunting Accuracy

We may earn revenue from the products available on this page and participate in affiliate programs. Learn More ›
In the complex formula of compound bow shooting form, grip is the thing that bowhunters mess up most often, and it’s also the factor that can have the most dramatic impact during a high-stress shooting situation involving steep angles. Put more simply, if you don’t get your grip right, you’re going to have a helluva hard time shooting accurately from a treestand when a monster buck steps out.
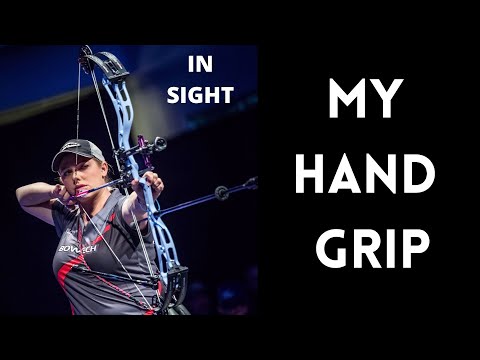
This is my main takeaway from a recent interview with Paige Pearce, a competitive archery champion and dedicated bowhunter. Pearce is a phenomenal teacher and a total grip geek. She says that grip style and angle all boil down to personal preference and comfort. If it feels good to you, promotes accuracy, and is repeatable, then go with it. However many bowhunters have a haphazard approach to grip that is not repeatable and therefore not accurate.
“If you think about it, your hand is the only part of your body that’s touching the bow,” Pearce says. “So hand grip is one of the most important things when it comes to your form, and it’s the thing that I see people do the most wrong across the board.”
Poor grip form induces torque, which equals poor shooting. But beyond basic grip form, a lot of how we grip a compound bow depends upon the individual’s wrist flexibility and mobility.
Here’s what all bowhunters should know about how to grip a compound bow, plus an explanation of why using proper grip technique will improve field accuracy.
Grip Basics
Here are the very basic steps for how to grip a compound bow:
- Hold up your hand as if making the “stop” signal.
- Now relax your fingers and ensure that your knuckles are at a 45-degree angle.
- Maintain this hand position and place the bow against the pad of your thumb along the inside of your lifeline. Do this while pulling the bowstring with slight pressure to set your grip under tension (more on this later).
- With relaxed fingers, allow the index finger to wrap around the front of the riser. Let your other fingers rest to the side of the riser
- Note: some archers like to have their middle finger and/or ring finger placed on the front of the riser, too. This is fine just so long as the fingers are relaxed and knuckles are at a 45-degree angle.
Here’s how Pearce teaches basic grip: “I tell them to walk over to the wall, stick your hand up, straight out against the wall, fingers up, and your wrist locked back. Now take a step back from the wall, keep your hand up, and let your front four fingers relax — there’s your hand grip.”
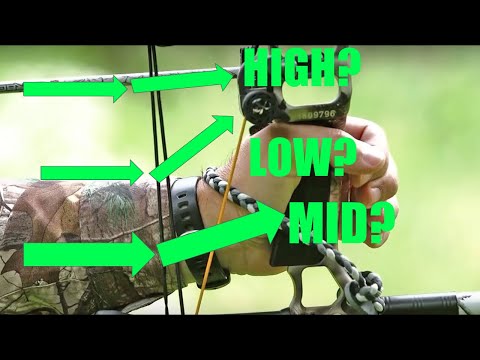
In the video above you can see the specifics of Pearce’s grip technique.
Bad Grip Styles and Common Mistakes
The Death Grip / Pistol Grip
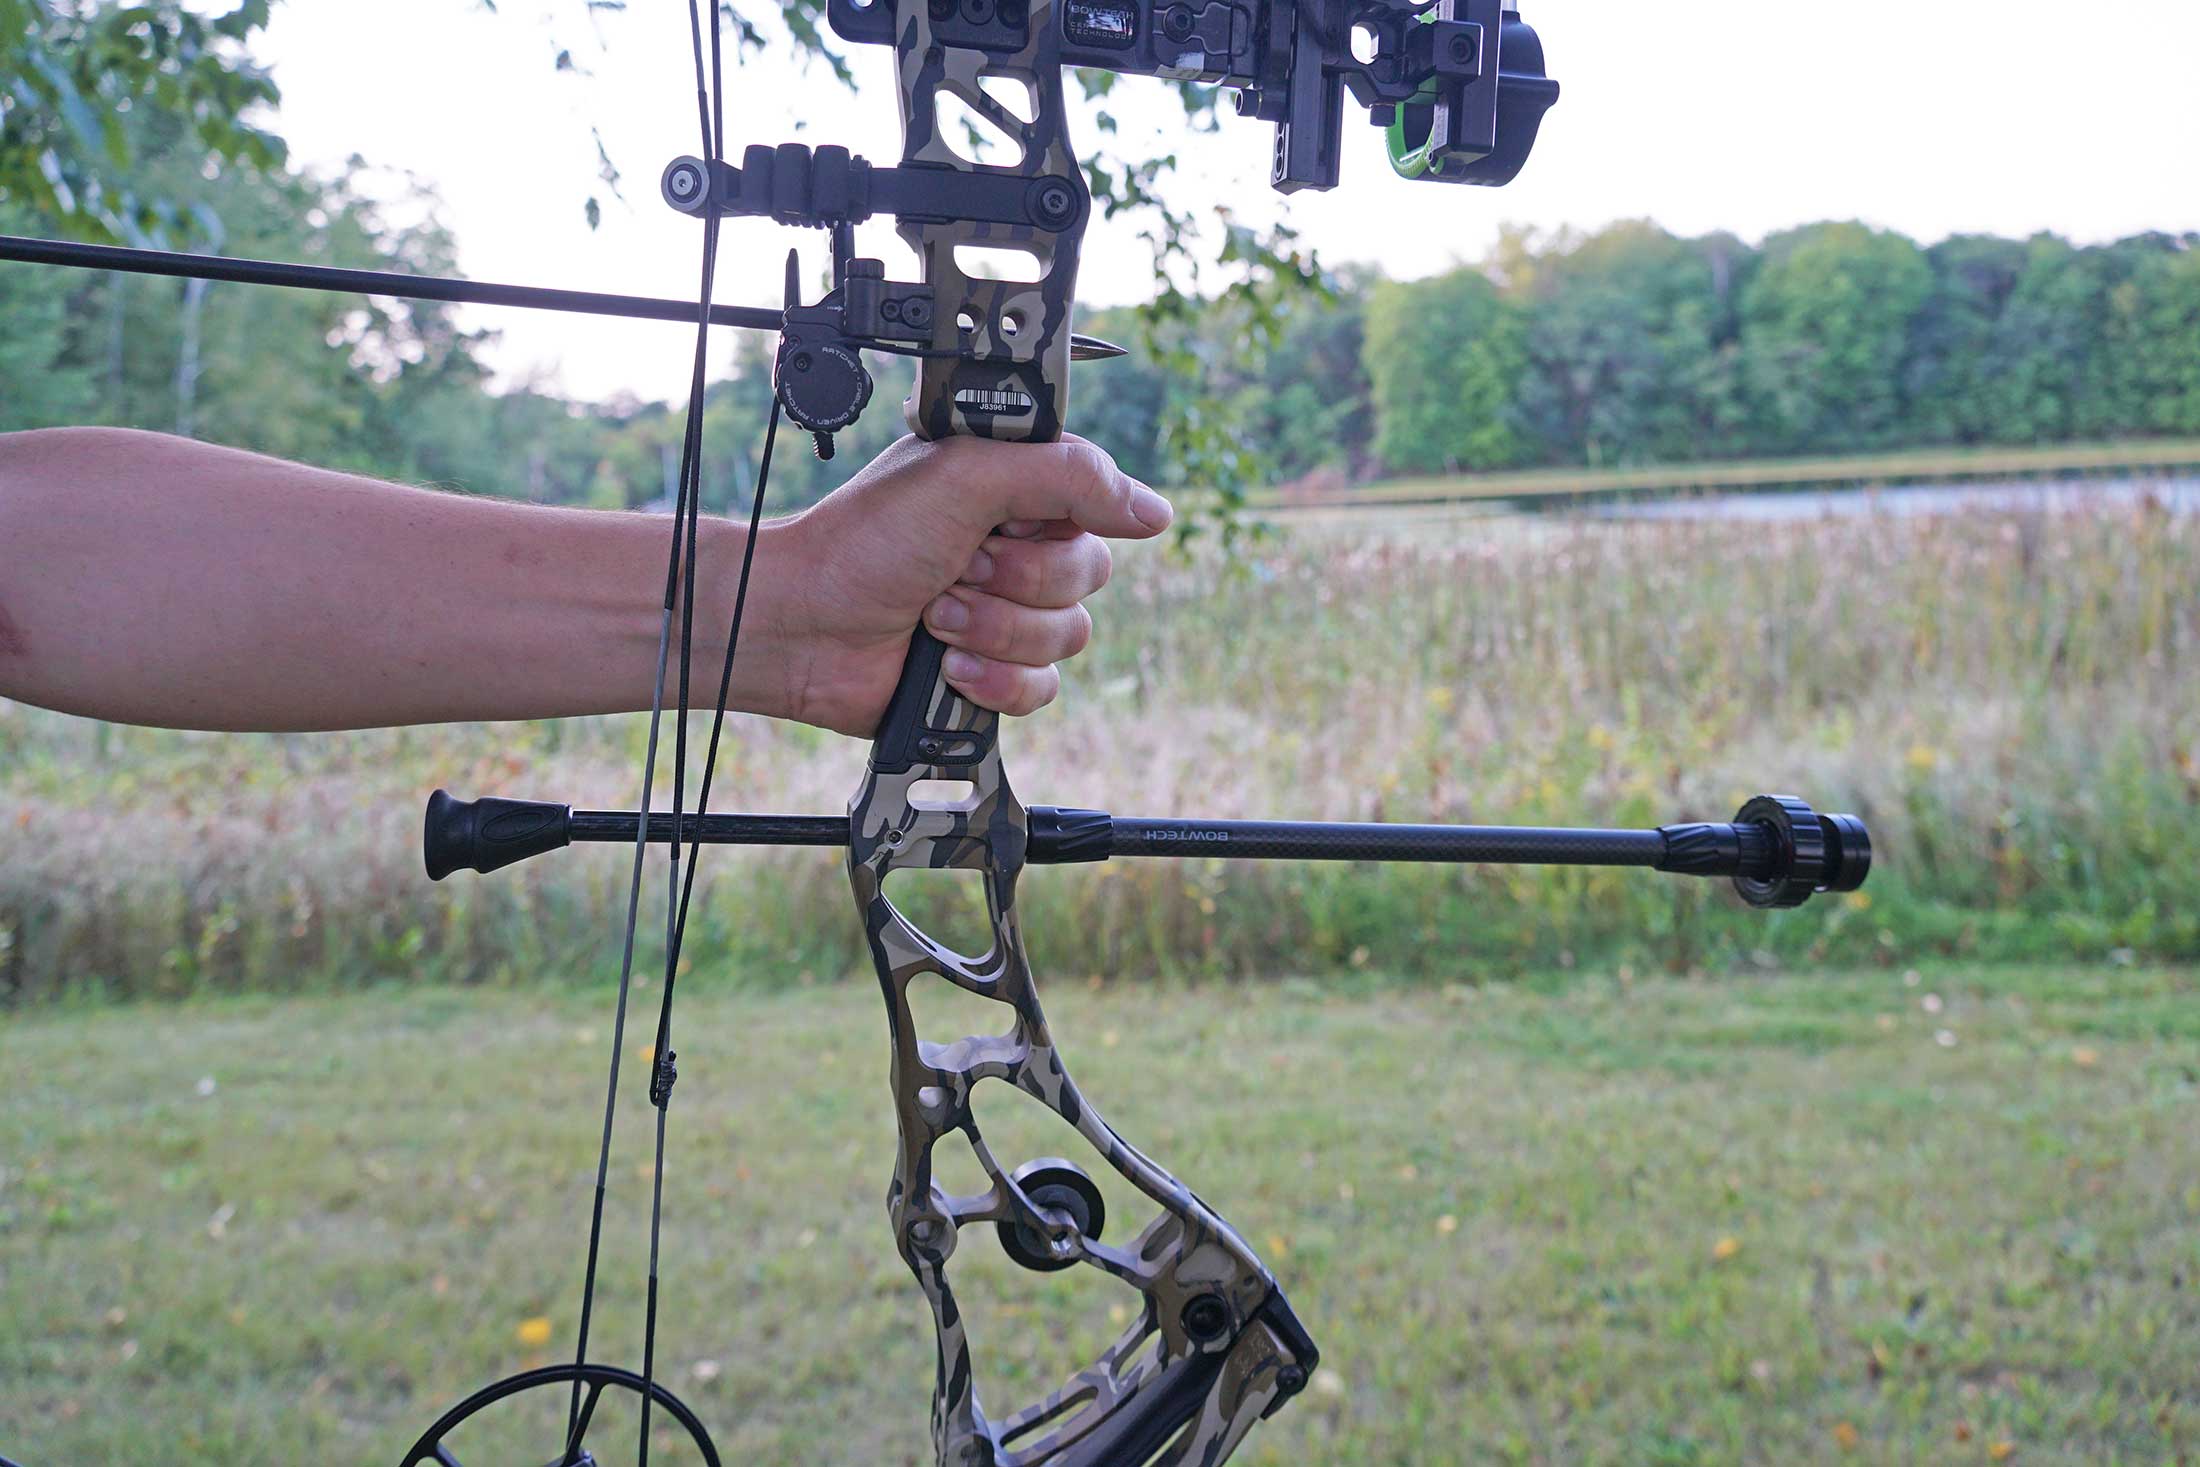
Photo by Alex Robinson
A bow grip is shaped a lot like a pistol grip, so it’s common for hunters to simply grab the grip by the sides and let’er rip. That’s terribly wrong. If you grip the bow this way, it won’t sit evenly across the pad of your hand (in other words the grip isn’t repeatable). Plus, you’ll end up wacking your bow arm with the string more often. Lastly and most importantly, this grip position creates a ton of torque which will cause you to spray arrows all over the target — and beyond.
The Extreme Open Grip
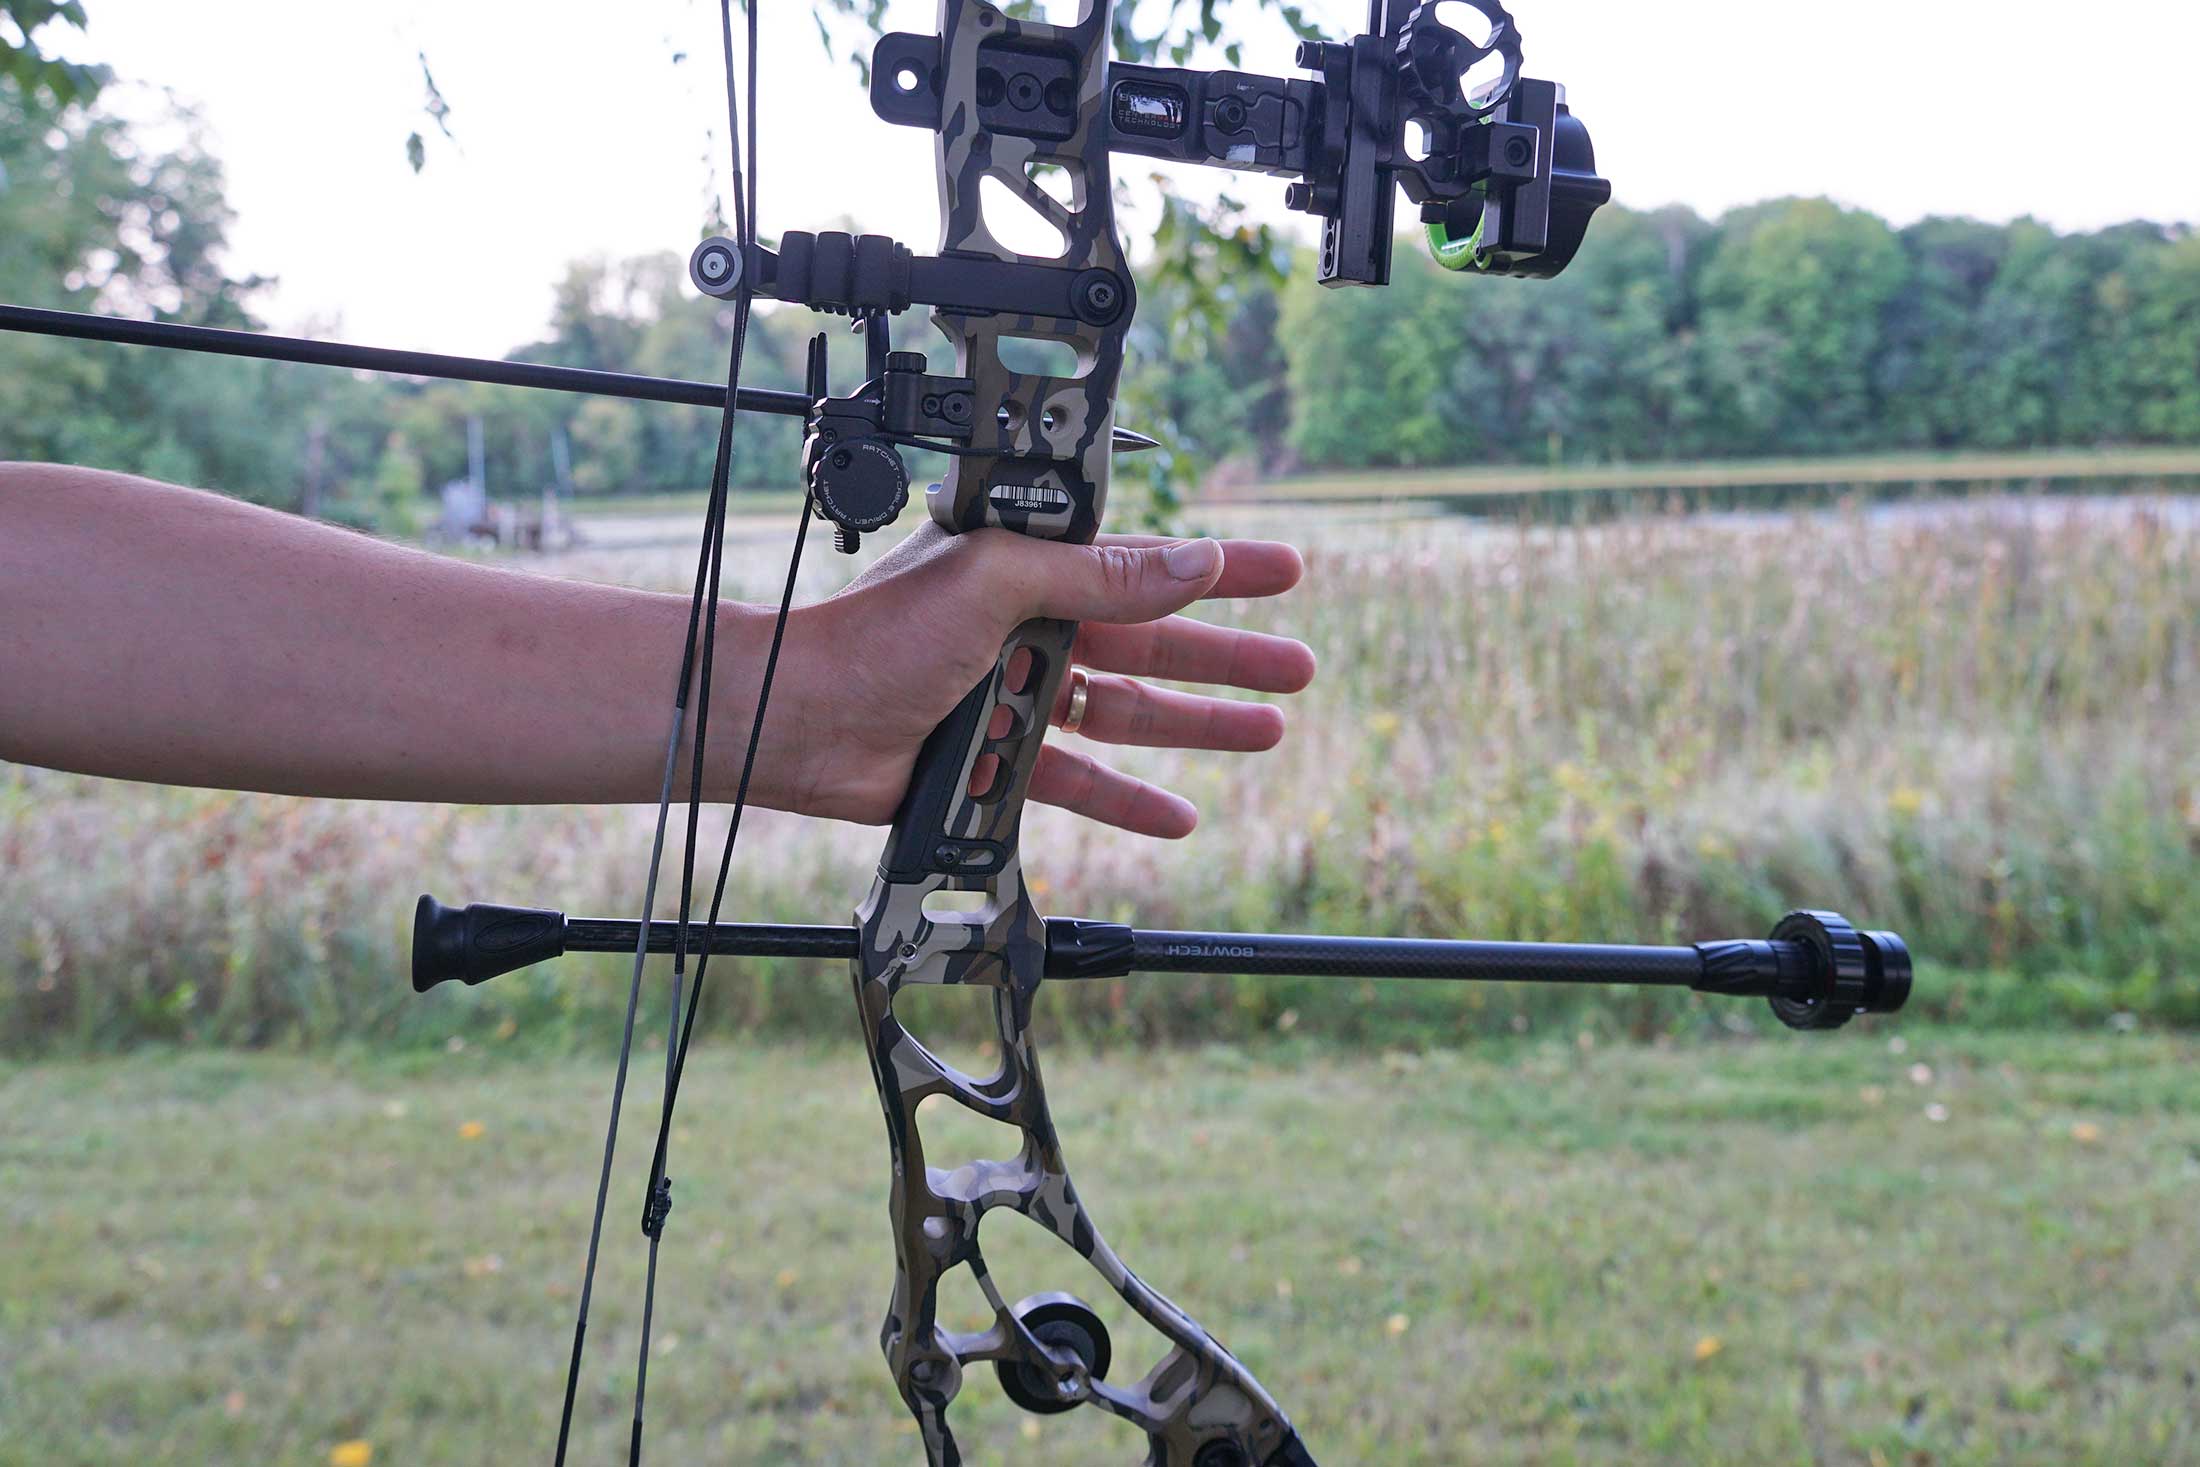
Photo by Alex Robinson
Many bowhunters know that the bow hand needs to be relaxed. So some shooters will straighten their bowhand fingers so that they’re pointing at the target and not touching the grip, almost as a way of saying: “look, I’m not death gripping the bow.” But this isn’t actually relaxing your hand.
“All that’s doing is adding unnecessary tension into your hand,” Pearce says.
During shooting instruction Pearce proves this to students by having them relax their empty hand at their side. When doing this, everyone naturally lets their fingers curl slightly into a half-closed fist. On the flipside, when you have your fingers fully straightened (palm down) you can see the tendons flexing through the top of your hand, indicating tension. The last problem with the extreme open grip is that, before the shooter releases an arrow, they instinctively and quickly close their bow hand (if they didn’t their bow would fly out of their grasp) which does not promote consistent accuracy. Bowhunters tend to do this even when they have a wrist sling, if they don’t you’d see the bow swing around wildly in their hand.
Why Grip Matters So Much for Bowhunters
Most bowhunters take their shots from treestands, which means we’re shooting at downward angles and sometimes from imperfect positions. So the good archery form that you practiced all summer long is now altered. Add stress to this shooting situation and you have a recipe for poor accuracy. But, if you maintain a good consistent grip in this scenario, you’re more likely to get away with other little imperfections in your shooting, Pearce says.
“This grip position is incredibly consistent, it’s using minimal energy, and it’s giving you something really solid to push against,” Pearce says.
For bowhunters this all becomes especially important because we might have to hold at full draw for longer than we would during a practice session.
Understanding Grip Angle and Other Nuances
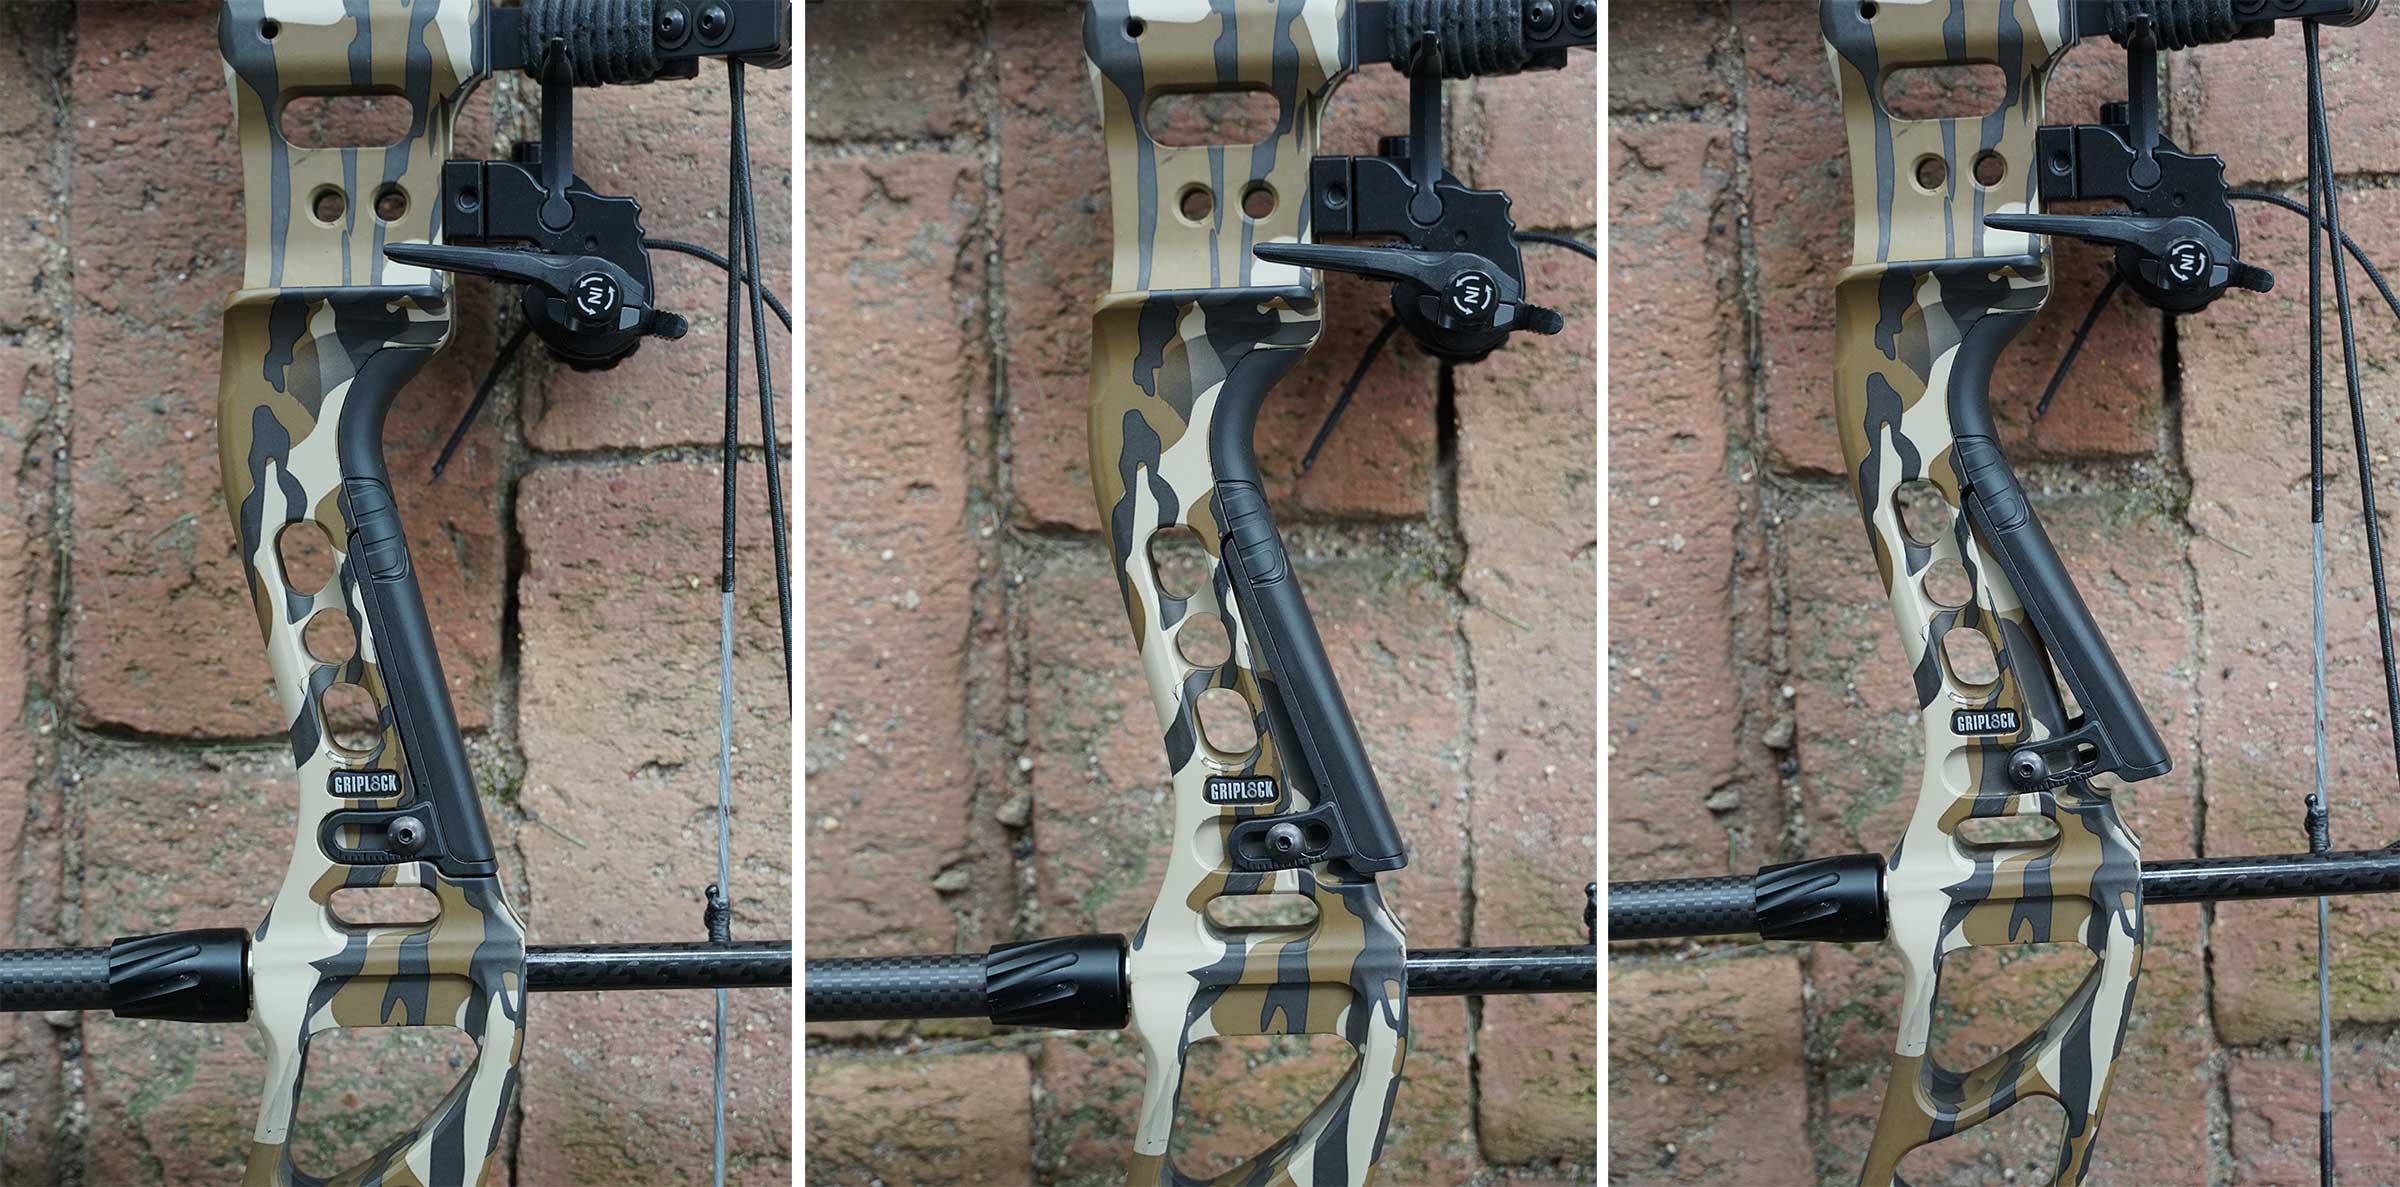
Photo by Alex Robinson
So now that we have the very basics down, here’s where things start to get interesting.
Every archer has a different hand shape, hand size, and wrist flexibility, so it’s natural that we’d have slightly different grip and wrist position preferences. Pearce says that in her experience, the most stable and repeatable position is for the archer to have their wrist fully locked back (think about your wrist position when doing a pushup and you’ll get the idea). This usually creates what’s considered a low-wrist grip and it allows the shooter to hold at full draw with their skeletal structure, not their muscles. It promotes a lower, more stable shoulder and a more stable bow arm in general.
“If you lock your wrist back, there’s nowhere else for it to go,” Pearce says. “It’s the most repeatable, consistent position that you can be in.”
However each individual’s wrist locks back at a slightly different angle so it makes sense that we would prefer different grip angles. Pearce has very flexible wrists so she shoots with a negative 2-degree grip angle. She uses an aftermarket product that adds mass to the throat (the top part) of her grip.
However, for those of us with less wrist mobility, we might want to increase grip angle. There are a handful of aftermarket grip options out there that will allow you to tweak the grip angle of your bow.
“You shouldn’t have to change your body or use something that doesn’t fit your body. We want the equipment to be able to work for you,” Pearce says.
This fall I’m shooting the Bowtech Core SR, which has the company’s “Griplock” feature. This allows the archer to adjust grip angle by simply loosening two screws (you can see adjustments in the photo above). After a little experimenting I found that the stock position was the most comfortable for me, but it was useful to see how the different grip angles and wrist positions felt while shooting.
How to Select the Right Grip Angle for You
So how do you decide which grip angle best fits your shooting style? The only real way to do this is through simple trial and error. Shoot a bow with a stock grip and while holding at full draw pay attention to where the pressure is on your bow hand. Pearce says you want an even amount of pressure across the pad of your hand. So, if you feel a ton of pressure in the web of your hand, you need to decrease the grip angle. If you’re feeling excessive pressure at the heel of your hand, you likely need to increase grip angle.
The shortcut for this experiment is to simply test shoot a Bowtech that has “Griplock” until you find the grip angle that feels best.
What Makes an Accurate Bow Grip?
While comfort is important, the most comfortable grip design on a bow would not actually be great for accurate shooting. If you imagine a grip that’s designed for maximum comfort, it would be hefty, cushy, and molded to the shape of your hand. But these grip attributes would encourage you to bear-paw the bow and induce all sorts of torque into your shot.
That’s why you see many modern bows with slim grips, flat backs and defined edges (not rounded ones).
“In general the less hand contact you can have with the bow while still having it feel comfortable is ideal,” says Josh Stevens a design engineer for Bowtech (he’s also the brains behind Griplock). “A narrower grip would technically be better, but you can’t go too narrow or it won’t be comfortable to hold on to.”
One key takeaway here is that when you go bow shopping, don’t just carelessly grab a bow off the rack, wrapping your hand around the side. Whether you like how it feels or not, this is now how the grip will feel while you’re shooting. Instead, pull gently on the string and set your grip as you would before going to full draw. This will give you a better idea of whether the grip design is right for you.
Stevens says that because people have such diverse opinions on gripstyle, Bowtech takes adjustability and customizability into account in all of its designs.
“Even if the grip that we make doesn’t work for everybody, at least there’s a way for them to [customize it] and make it work for them,” he says. “If you grab onto a bow and it doesn’t feel good, you’re not going to buy that bow, so we at least want to have a path for it to feel good to everyone.”
Expert Grip Tips
Once you’ve got the basics mastered, there are little tweaks you can make to ensure that your grip is the same every time.
Set Your Grip Under Tension
Pearce says that you should always set your grip under tension. This means that you pull gently on the string to set your grip before actually drawing the bow. You do not want to draw the bow and then try to get your hand into the proper position while at full draw.
Add a Sticker Reference Point
Another trick is to put a small sticker on the front of your riser as a reference point for your index finger. This ensures that your finger is in the same place every time (think of it as a kisser button, but for your grip).
Use Grip Tape
Adding some grip tape to your bow can make for a more comfortable feel during cold bowhunting conditions, especially if you’re shooting an aluminum riser. But if you do add tape make sure you get plenty of good practice sessions in with it on before you go hunting (as a bonus, grip tape is also useful for shooting with sweaty palms in the heat of summer).
Read Next: The Easiest Way to Tune Your Bow for Broadheads
Final Thoughts on Why Grip Is So Important for Hunters
No matter how you feel about wrist position or bow grip style, one thing is certain: in order to achieve optimal accuracy your grip must be repeatable. Pearce’s approach to grip is logical and it’s been proven both in competition and the woods. Use her fundamentals to improve your grip form and then tweak as you go for your own preferences and comfort.
The post How to Grip a Compound Bow for Better Hunting Accuracy appeared first on Outdoor Life.
Source: https://www.outdoorlife.com/hunting/how-to-grip-a-compound-bow/