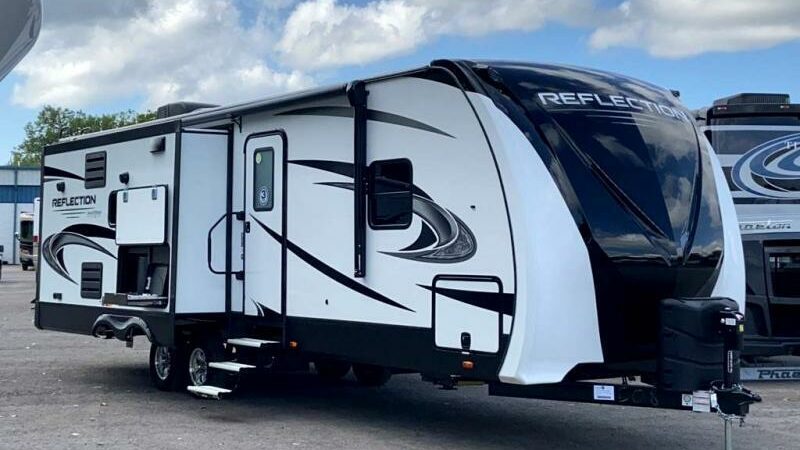
DIY RV Skirting Using Foam Board Insulation
Thanks for your support! If you make a purchase using our links in this article, we may make a commission. And, as an Amazon Associate, I earn from qualifying purchases. See the full disclosure here.
For those of us who like to travel during the winter, or stay in one place for an extended time, RV skirting is a great way to increase heating and cooling efficiency. However, purchasing RV skirting can be expensive. A great alternative we use is DIY foam board RV skirting.
Do-it-yourself RV skirting is a great way to enjoy the benefits of RV skirting at a portion of the cost. DIY RV skirting is also a fantastic way to make RV skirting that perfectly fits your particular rig. In this article, we will share the benefits of RV skirting and give some basic instructions on how to create your own.
Do You Really Need RV Skirting?
Not every RV owner needs RV skirting. However, for some RVers, skirting can provide amazing benefits and increased comfort. For those RV owners who love to stay in one place for an extended period, RV skirting is an essential accessory for a few reasons.
Protect The Plumbing System
The floor of your RV does not have the quality of insulation that the rest of your RV does. In fact, most of the floor or your RV has nothing more than an air gap.
The reason for this is that features like drain lines, water tanks, and waste tanks are held between the floor and the outer covering of the RV. This minimal insulation means that heat and cold transfer occurs at a great rate through the floor of your RV.
Extend Your Camping Season
The RV owner who will enjoy the greatest benefit from investing in RV skirting is the one who, like us, loves cold-weather travel. Staying in colder climates in your RV, especially for an extended period of time can put a lot of stress on your RV’s heater.
It can also create a bit of discomfort on the bottom of your feet. Cold air passing under your RV chills the floor of your rig. This reduces the heat retention capabilities of your RV. Using RV skirting insulates the underside of your RV, keeping heat in and improving the efficiency of your heater.
Works In Hot Weather Too
For those RVers who enjoy extended stays in warm locations, particularly in the summer, RV skirting is also helpful. As with cold weather camping, hot temperatures around your RV can increase the demand on your air conditioning unit. Using RV skirting will keep more of the cool air inside of your RV, without the increased operation from the air conditioner.
While long-term stationary RVers are the most common users of RV skirting. It is also popular for RVers who enjoy cold weather camping. Even if you are only staying a short time in a cold-weather location, RV skirting can make a huge difference in your comfort.
How Much Is RV Skirting?
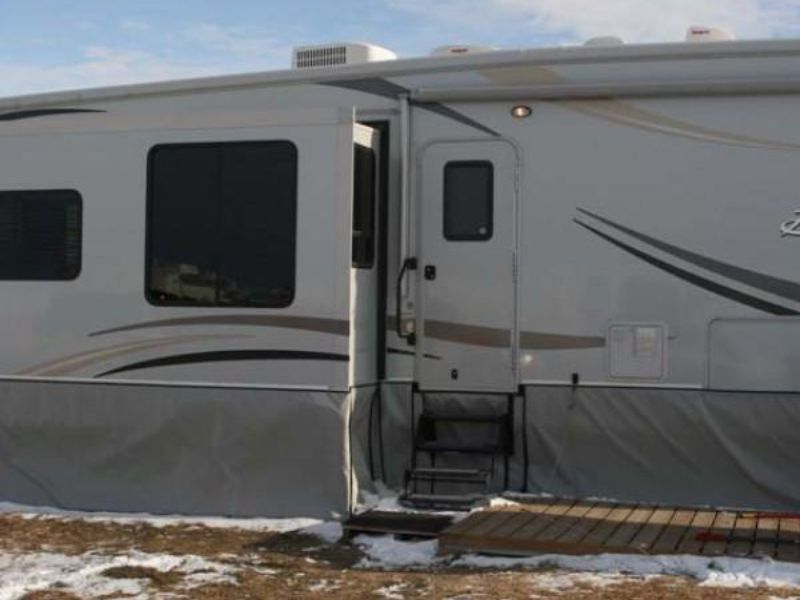
The one thing about RV skirting that deters owners from making the investment is the price. Purchasing RV skirting, especially that which is an exact fit for your rig can be very expensive.
After-market or generic RV skirting can be a bit more affordable. However, these products may require a bit of creative thinking to make them work with your RV. Lightweight “universal” skirting kits can be as cheap as a few hundred dollars and custom heavyweight kits can be a few thousand.
In the long run, however, for stationary or cold weather RVers, investing in skirting can be a money saver. Not only will you have a more enjoyable experience, but you place less demand on your furnace and/or air conditioning.
These are two of the more costly appliances in your RV to replace. Using your air conditioner or furnace heavily also increases your maintenance costs. RV skirting can reduce the amount of time and money you spend on periodic maintenance of your RV heater and air conditioner.
What Is Foam Board Insulation?
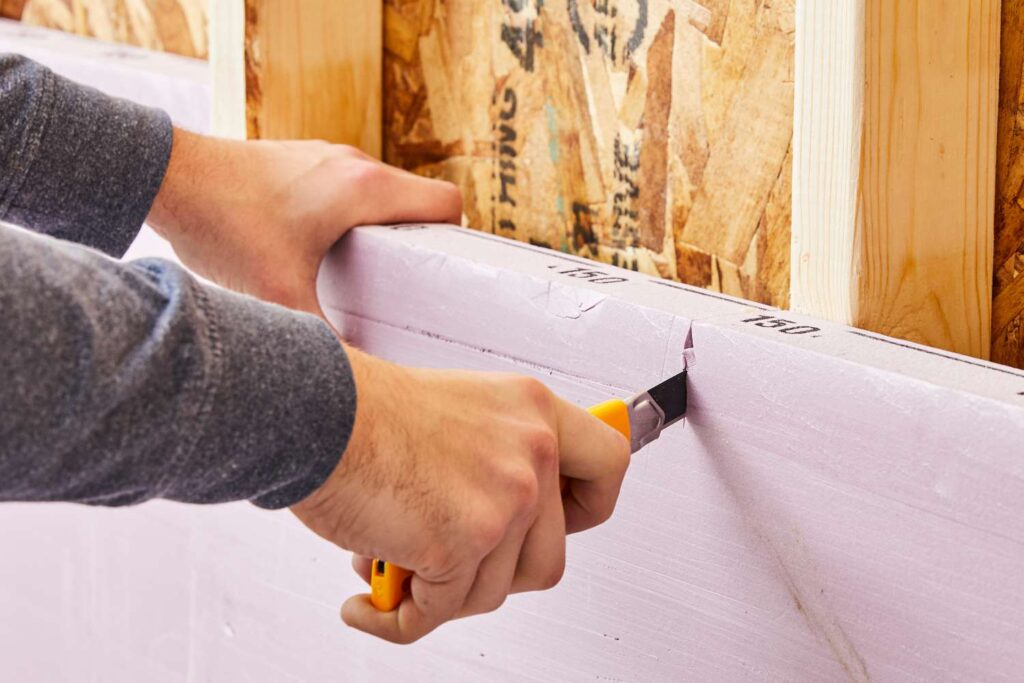
Most people wanting to make their own RV skirting use foam board insulation. This product is lightweight, easy to manipulate, and reasonably affordable.
As the name suggests, foam board insulation is a firm type of insulation. It is made from sheets of polystyrene, polyisocyanurate, or polyurethane. These types of foam are great for providing insulation for a variety of purposes with minimal bulk and are very lightweight.
While you may not think you are familiar with foam board insulation, you have probably seen it in passing. Typically, foam board insulation is used in residential and commercial building construction.
It is most frequently used between the plywood wall and whatever material is being used as a siding. It provides great insulation while also being thin enough to work with most standard construction nails and screws.
The great thing about foam board insulation is that it comes in a wide variety of thicknesses and retention or R values. Depending on how much protection you want from your foam board RV skirting insulation you likely have a variety of options.
The foam board is rated based on the type of foam and the thickness of the panel. Typical foam board used in residential construction is around 1 inch thick and has an R-value of 4. Thinner foam board will have a lower rating, while the thickest foam board commercially available has a rating of R8 and is 2 inches thick.
How To Make DIY RV Skirting From Foam Board Insulation
Now that you know a bit about foam board and how it can be beneficial in making DIY RV skirting, we would like to offer some basic instructions on making your own.
This project is not terribly difficult. However, to have the greatest benefit from your DIY RV skirting you will need to take time to measure properly and cut carefully. We suggest keeping the old adage, “Measure twice, cut once,” in the front of your mind as you complete your project.
When you are selecting foam board to be used you need to consider two factors. The first is how much protection or temperature retention you are looking for. The second is how much space you have to store your skirting.
If you do not have a lot of space, find a product that has the highest R-value available in the thinnest board. Some half-inch boards provide great R-value ratings due to the type of foam they are made from.
We have found at Home Depot that 1″ rigid foam board provides an R-5 rating. The 1 1/2″ foam board has a 7.5 RV value and the 2″ foam board insulation provides a RV value of 10.
Before you start your project gather the tools and materials that you will need. These are the materials that we would recommend. However, you may find that you do not need all of these or may want something different depending on how you plan on connecting the skirting to your RV.
Materials and Tools:
- Foam Board Insulation – look for 4’x8’ sheets of 1-inch thick foam board. You can use a thicker foam board (or thinner) depending on how much insulation you want and how much storage space you have.
- Measuring Tape
- T-Square, Straight Edge, or Yard Stick – We like T-squares that are longer. They are really the perfect tool for making accurate straight-line cuts.
- Utility Knife, Box Cutter, or Foam Board Cutter
- Marker
- Duct Tape and/or HVAC Foil Tape
- Scissors
Optional Materials:
- Exterior House Paint (or other cover material)
- Velcro Stripping
- Grommet Kit
- Tent Stakes
- Zip Ties
- Bungy Cords
With these tools and materials in hand, you can now start creating your DIY RV skirting. The steps below are general directions, you may find that you need to adjust these instructions to better fit your needs.
DIY Foam Board RV Skirting Instructions:
- Measure the RV – You will need to measure the length around your RV as well as the height between the bottom of your RV and the ground. To make the height measurement as accurate as possible, do this while parked on flat, even ground.
- Acquire the proper number of foam sheets – Calculate this value using the length around your RV. Depending on the height, you may be able to use fewer boards. We would recommend that you have an extra couple of boards, just in case.
- Mark boards with proper measurements – Use a pencil or marker to mark the foam at the proper width and length. Use your T-square to make straight cutting lines across the entire sheet of foam. Measure carefully to ensure that your boards will fit snuggly against the bottom of your RV.
- Cut the boards – Use a sharp cutting tool such as a utility knife or foam board cutter. You may want to utilize the T-square or straight edge to help make a smooth cut.
- Cut-in access points – Add cut-outs for things like your sewage hose, water hose, or storage compartments that you may want to access when you are parked.
- Cover or paint the foam sheets – You may want to cover the outside of the foam board with a material like self-stick flooring or paint with exterior home paint. This will make the sheets of foam look more attractive. You will want to do this before you start securing the skirting to the RV.
- Build a frame – This may not be necessary, however, it can strengthen the skirting. Using 2×2 or similar boards makes a lightweight frame and is something solid to attach foam board to.
- Secure the skirting panels together – There are a few ways to make this connection. Using duct tape or foil HVAC tape is a quick and easy option. It also provides a weather-proof seal. However, if you do not want to tape and un-tape each time you use your skirting, you may want to use self-stick Velcro as an option. Velcro is relatively durable and works well to securely attach many things to your RV.
- Secure the bottom of the skirting – This step keeps the bottom of the foam sheets from moving around. Many people simply use tent stakes along the bottom of the skirting. This is the easiest option if you are parked somewhere with dirt. Grommets for the stakes can be added to the bottom of the foam sections. You can also use snow, boards, dirt trenches, brick or rock, or any other material with a bit of weight.
- Cover gaps between sections – Use your duct tape or HVAC foil tape to seal the gaps between each section of skirting. This technique is ideal because it is easy to remove when you take the skirt off.
Your foam board RV skirting is quite customizable. With a bit of creativity, you can make custom RV skirting that is as simple or as fancy as you would like.
Remember that like everything else that goes with your RV, your DIY RV skirting does need to be cared for if it is to last a good amount of time. Make sure that it is stored in a safe spot when not in use.
Also, make sure you clean the bottom of each section after use so that dirt and grime do not create extra wear and tear on your RV skirting.
What Type Of RV Skirting Is Best?
When it comes to RV skirting, the type you select is really about what works best for you and your RV.
A DIY RV skirt may be great for you now, but over time, you may find that a different option is better. Fortunately, there are a wide variety of RV skirting options to select from.
If you are traveling in the winter or want to stay in a single spot for an extended time, an RV skirt of some sort is really an essential accessory.
DIY RV skirts are a great option if you are on a budget and do not mind doing the work. It is also nice if you want to make your RV skirting personalized or to match your RV. However, this option is not for everyone.
Vinyl RV Skirting
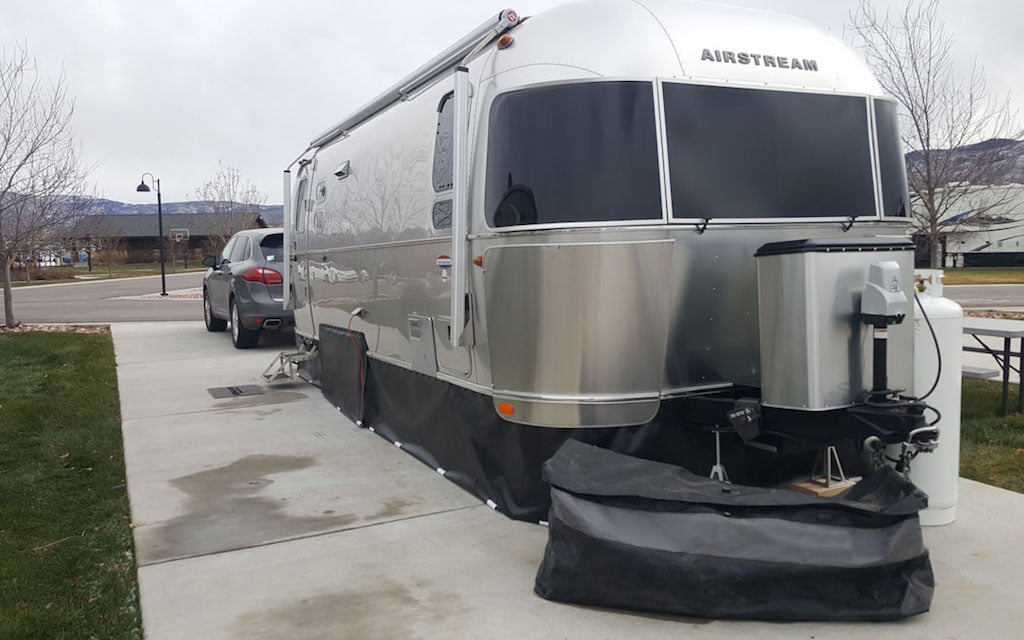
Vinyl RV skirting is quite popular and is one of the more affordable skirting options for RVs. It is also lightweight and fairly compact. This makes it easy to store and does not add a ton of weight to your RV or tow vehicle.
EZ Snap is a trusted name in vinyl RV skirting and they have kits to fit all RVs
The problem with vinyl skirting is that some RV parks and campgrounds do not allow this type of skirting. The reasons vary but in general, this prohibition has to do with appearance and structure.
If this prohibition is not of concern to you, and you are not really into the DIY project, vinyl skirting is a great option.
AirSkirts RV Skirting
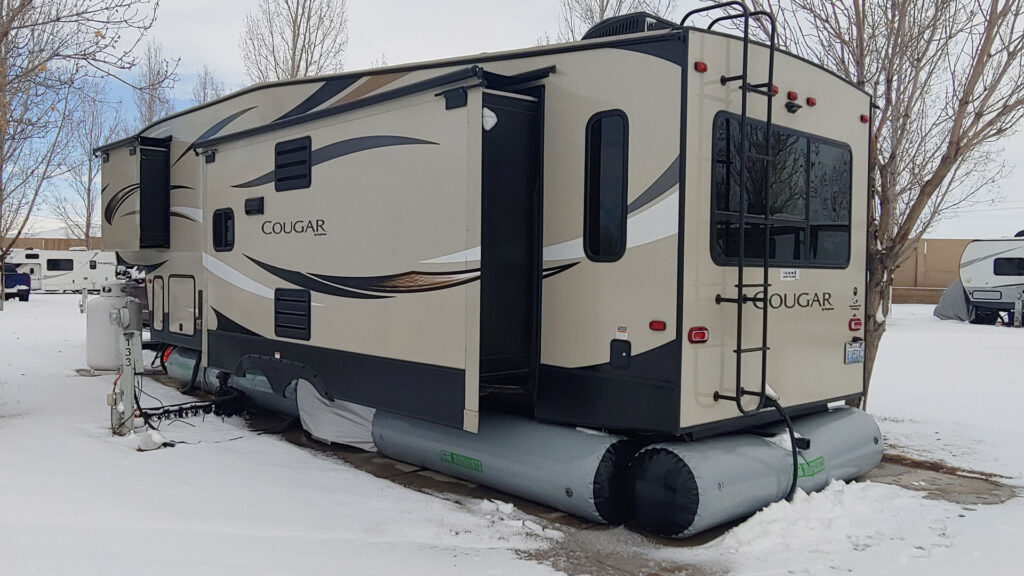
One of the more interesting RV skirt options on the market today is AirSkirts. This option is a series of inflatable tubes that are placed between the ground and the bottom of your RV.
They are made from sturdy materials that stand up well to the elements. When uninflated, AirSkirts take up minimal room in your RV. They are made from quality materials and when packed up for storage are pretty heavy.
These quality materials and quick setup and teardown come with a price and AirSkirts are pricey but worth it for those serious about RV skirting.
No matter which option you select, it is important that you carefully measure and size your RV skirting. Selecting an option that is too large or too small will defeat the purpose of installing skirting.
Additionally, if you select an option that is difficult for you to install, the value and time necessary may be not worth the investment.
Final Thoughts About DIY RV Skirting
For RVers who enjoy traveling during the winter or would rather stay in one place for a longer amount of time, RV skirting is a great investment.
Besides keeping your RV warmer, a quality RV skirt will protect your plumbing from freezing and add a layer of protection from pests.
Commercially manufactured RV skirting can be a bit on the pricey side. So it may seem impractical to those on a budget.
A good alternative to the options you can buy on the internet or from your local RV dealer is DIY RV skirting. This option can be more affordable and can allow you to create a product that suits your RV and your budget.
Related Reading:
–Travel Trailer And RV Insulation Guide: R-Values Explained
–RV Window Insulation Tips For Winter And Summer
–Will RV Skirting In Summer Help Keep Your RV Cool?
–RV Skirting For Winter – DIY Or Brand Name?
Jason Gass – Author and Part Time RVer
Jason Gass is a full-time freelance writer and part-time RVer whose goal is to share great stories around a campfire with good friends.
When he’s not working, he spends most of his time camping, searching for the best breweries, and road-tripping in his teardrop trailer with his wife, daughter, and two dogs.
