A Better Way to Zero and Sight in Your Rifle
We may earn revenue from the products available on this page and participate in affiliate programs. Learn More ›
It is one of the most time-honored rituals for hunters and shooters: the sacred act of sighting in to zero a rifle. Different sportsmen go about this in different ways. Some use targets designed with 1-inch grids, others are content to draw a circle-like shape with a marker on whatever piece of cardboard is handy. In any case, shots get fired, groups are scrutinized, and some adjustments are made to the scope.
But is the rifle actually zeroed? Well, it depends — but probably not. Chances are too few shots were fired to really assess where the rifle is shooting and, on top of that, the corrections dialed into the scope could have been more precise. Most people walk away from the range with a “near-o” rather than a zero, as one of my precision rifle buddies aptly puts it.
And often that’s good enough. If all you need is minute-of-deer at 100 yards, your zero can be pretty elastic.
But if you want to really know where your gun shoots, and how well it shoots, follow the simple steps outlined below. This method allows you to gather better data, avoid frustration, and ultimately use less ammo as you search for a perfect rifle zero.
Zeroing a Rifle the Old-School Way
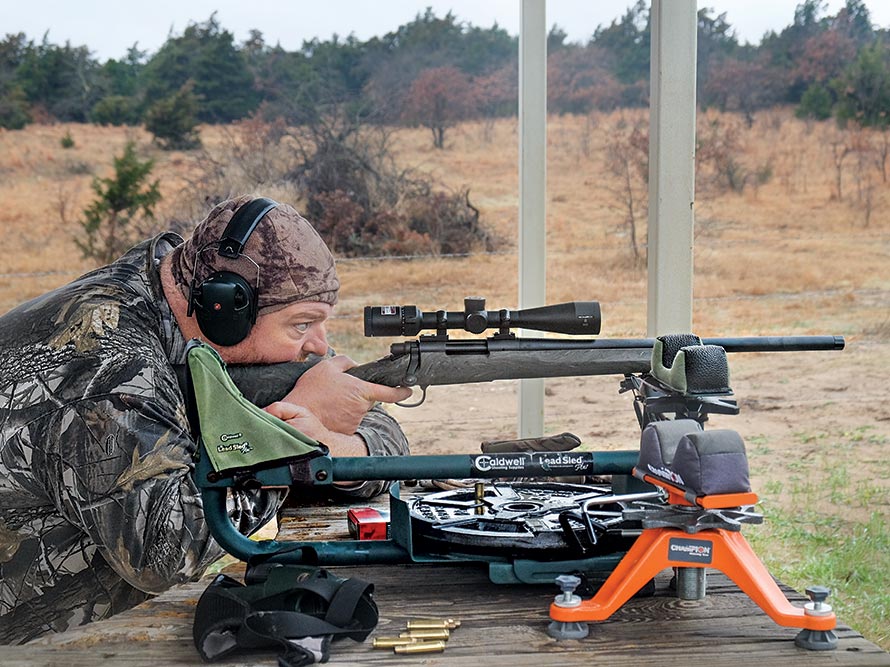
Before we jump into those details, let me sketch out a scenario that you might relate to. This is how I used to sight in when I was younger.
Before the deer opener, I’d go to the range with my brother or a buddy and I’d put three shots on paper at 100 yards with my .30/06 or .35 Remington. Based on the center of that triangular group, I’d move my reticle a couple clicks this way and that.
After my shooting partner did the same — while allowing my barrel to cool — I’d put a few more shots downrange to confirm my zero. Naturally, the shots didn’t quite go where they were supposed to. I’d then dial in another correction and shoot again — and before long I was chasing my zero around the paper with every shot or two I took.
By the end of the exercise, I might have shot 15 rounds or more and still didn’t know exactly where my gun was shooting, but I’d call it good anyway.
How to Zero a Rifle Better
Later on, I switched to shooting five-shot groups, which gave me a better idea of what my rifles were doing (I’ve written before about how three- and five-shot groups compare), but even so, I’d often be disappointed by where my confirmation shots landed.
It turned out that I wasn’t taking the final, crucial step while gathering my data, which is to combine all my shots into a larger, single group.
Our Sample Sizes Are Too Small
A baseline understanding of statistics tells us we need to collect a certain amount of data before we can draw accurate conclusions from it. Neither three- nor five-shot groups reach that threshold. But once a sample size gets to around 20 shots, we can have more confidence in the data.
A group of employees at Hornady have been leading the charge with this, both in terms of testing and gathering data in large sample sizes, sometimes shooting groups of 100 shots or more. (To understand why this matters, check out the podcast episode, “Your Groups Are Too Small”).
Aggregating Group Data
At Outdoor Life we’ve taken this information to heart. In our annual rifle test and in individual gun evaluations you’ll see that we’ve started to add 20-shot group sizes to the reviews as well as the mean radius of the group. (Put simply, mean radius is the average distance from the center of the group that the shots impact. It is a more valid predictive tool than group size.)
Overlaying Groups to Zero a Rifle
Getting 20-shot group data is easier than you might think. You simply shoot a series of groups at different aiming points without adjusting your scope and then break out your first-grade art skills to plot them on a single piece of paper around a single aiming point.
Once you have all your dots on the paper, you can use the group analysis tool in the Hornady 4DOF app to calculate the group size, mean radius, and where the center of the group is in relation to your aiming point. This last bit allows you to make one accurate adjustment to your scope to truly zero your rifle. The basic 4DOF app is free, but the group analysis upgrade costs $4.99. The Ballistic X app also does this and can be purchased for a reasonable fee of $7.99.
John B. Snow
Use the Right Target
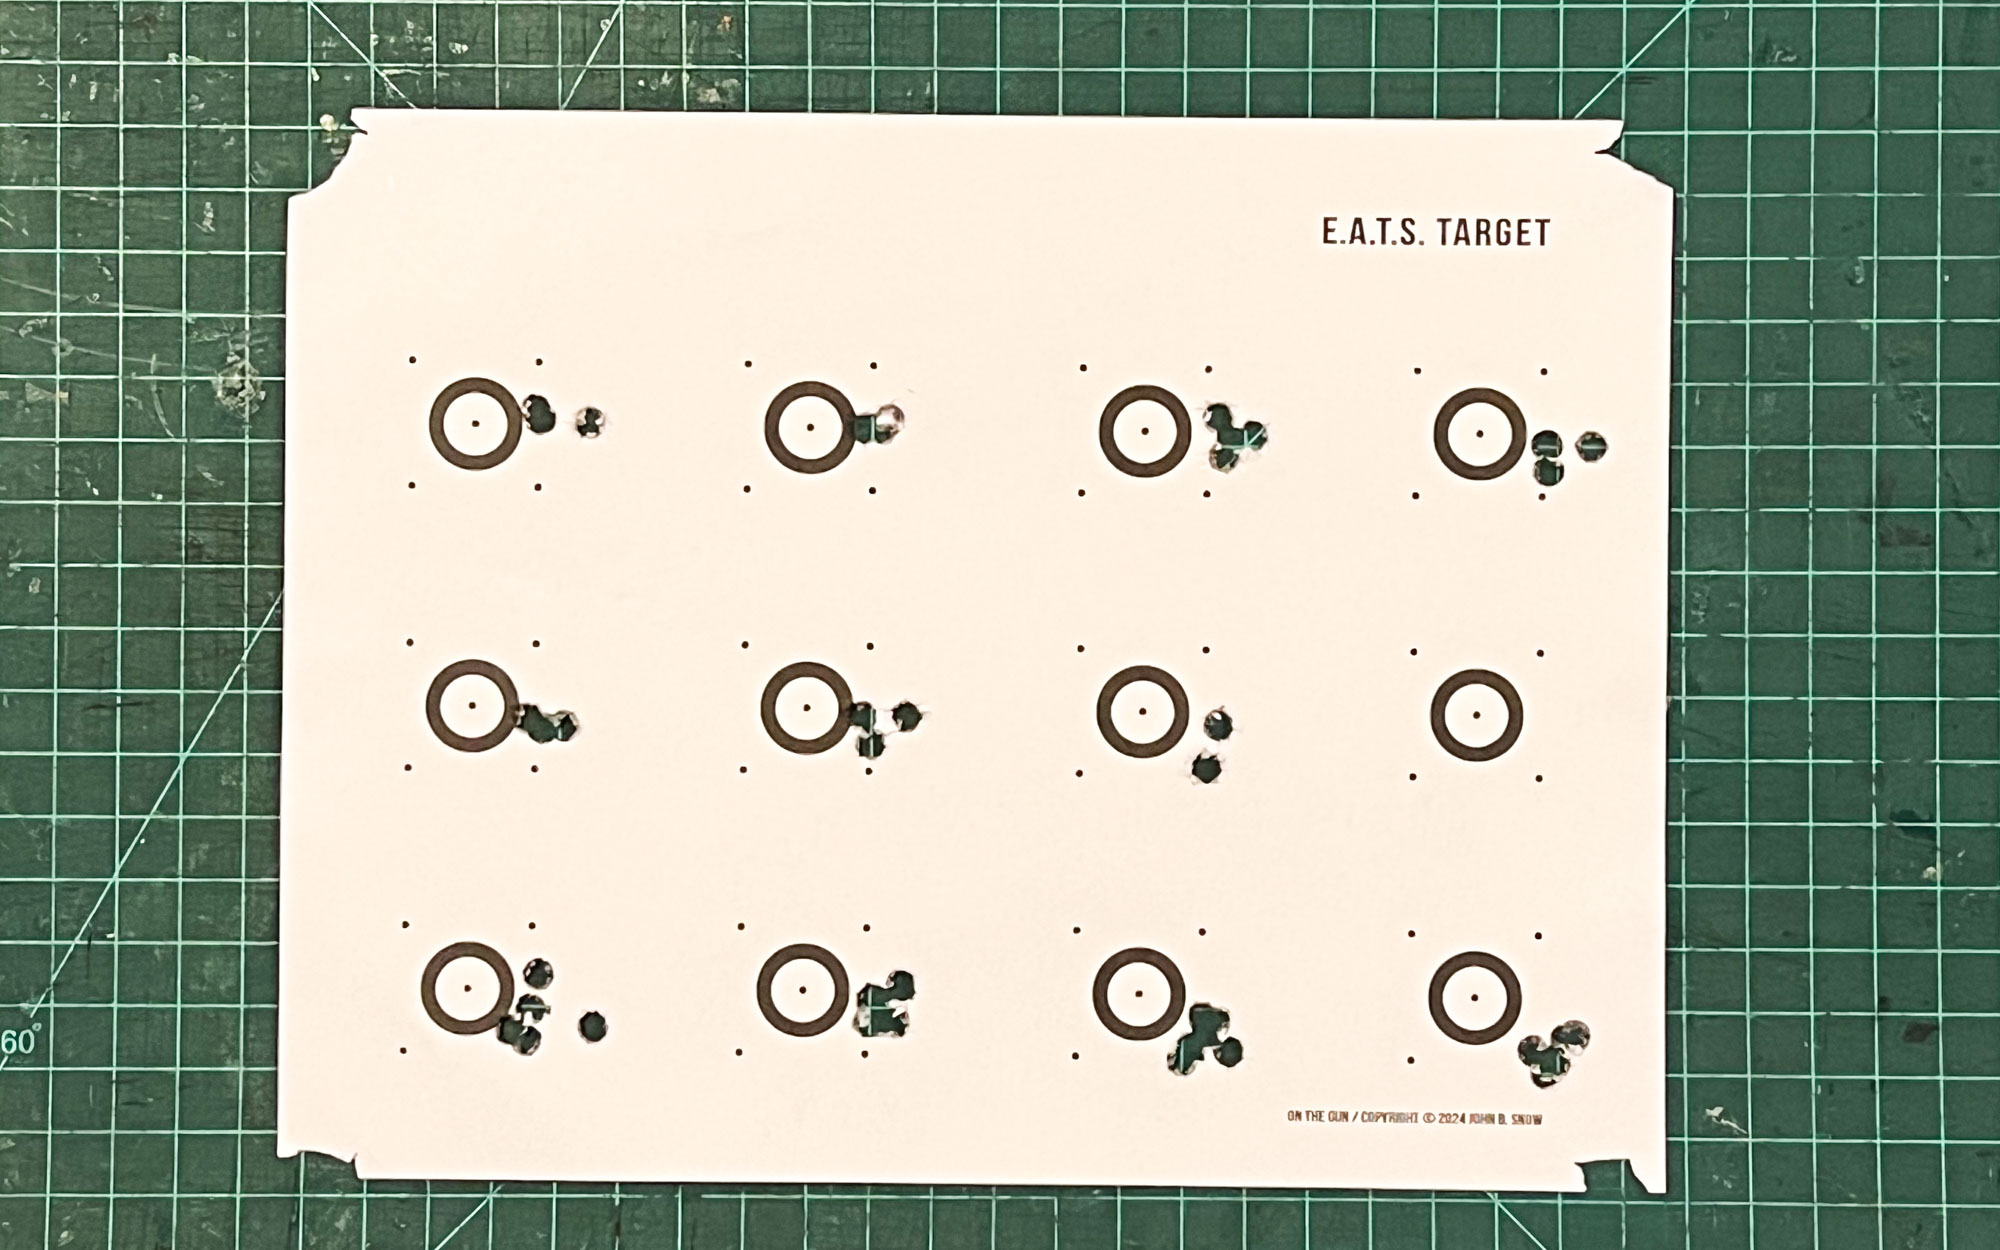
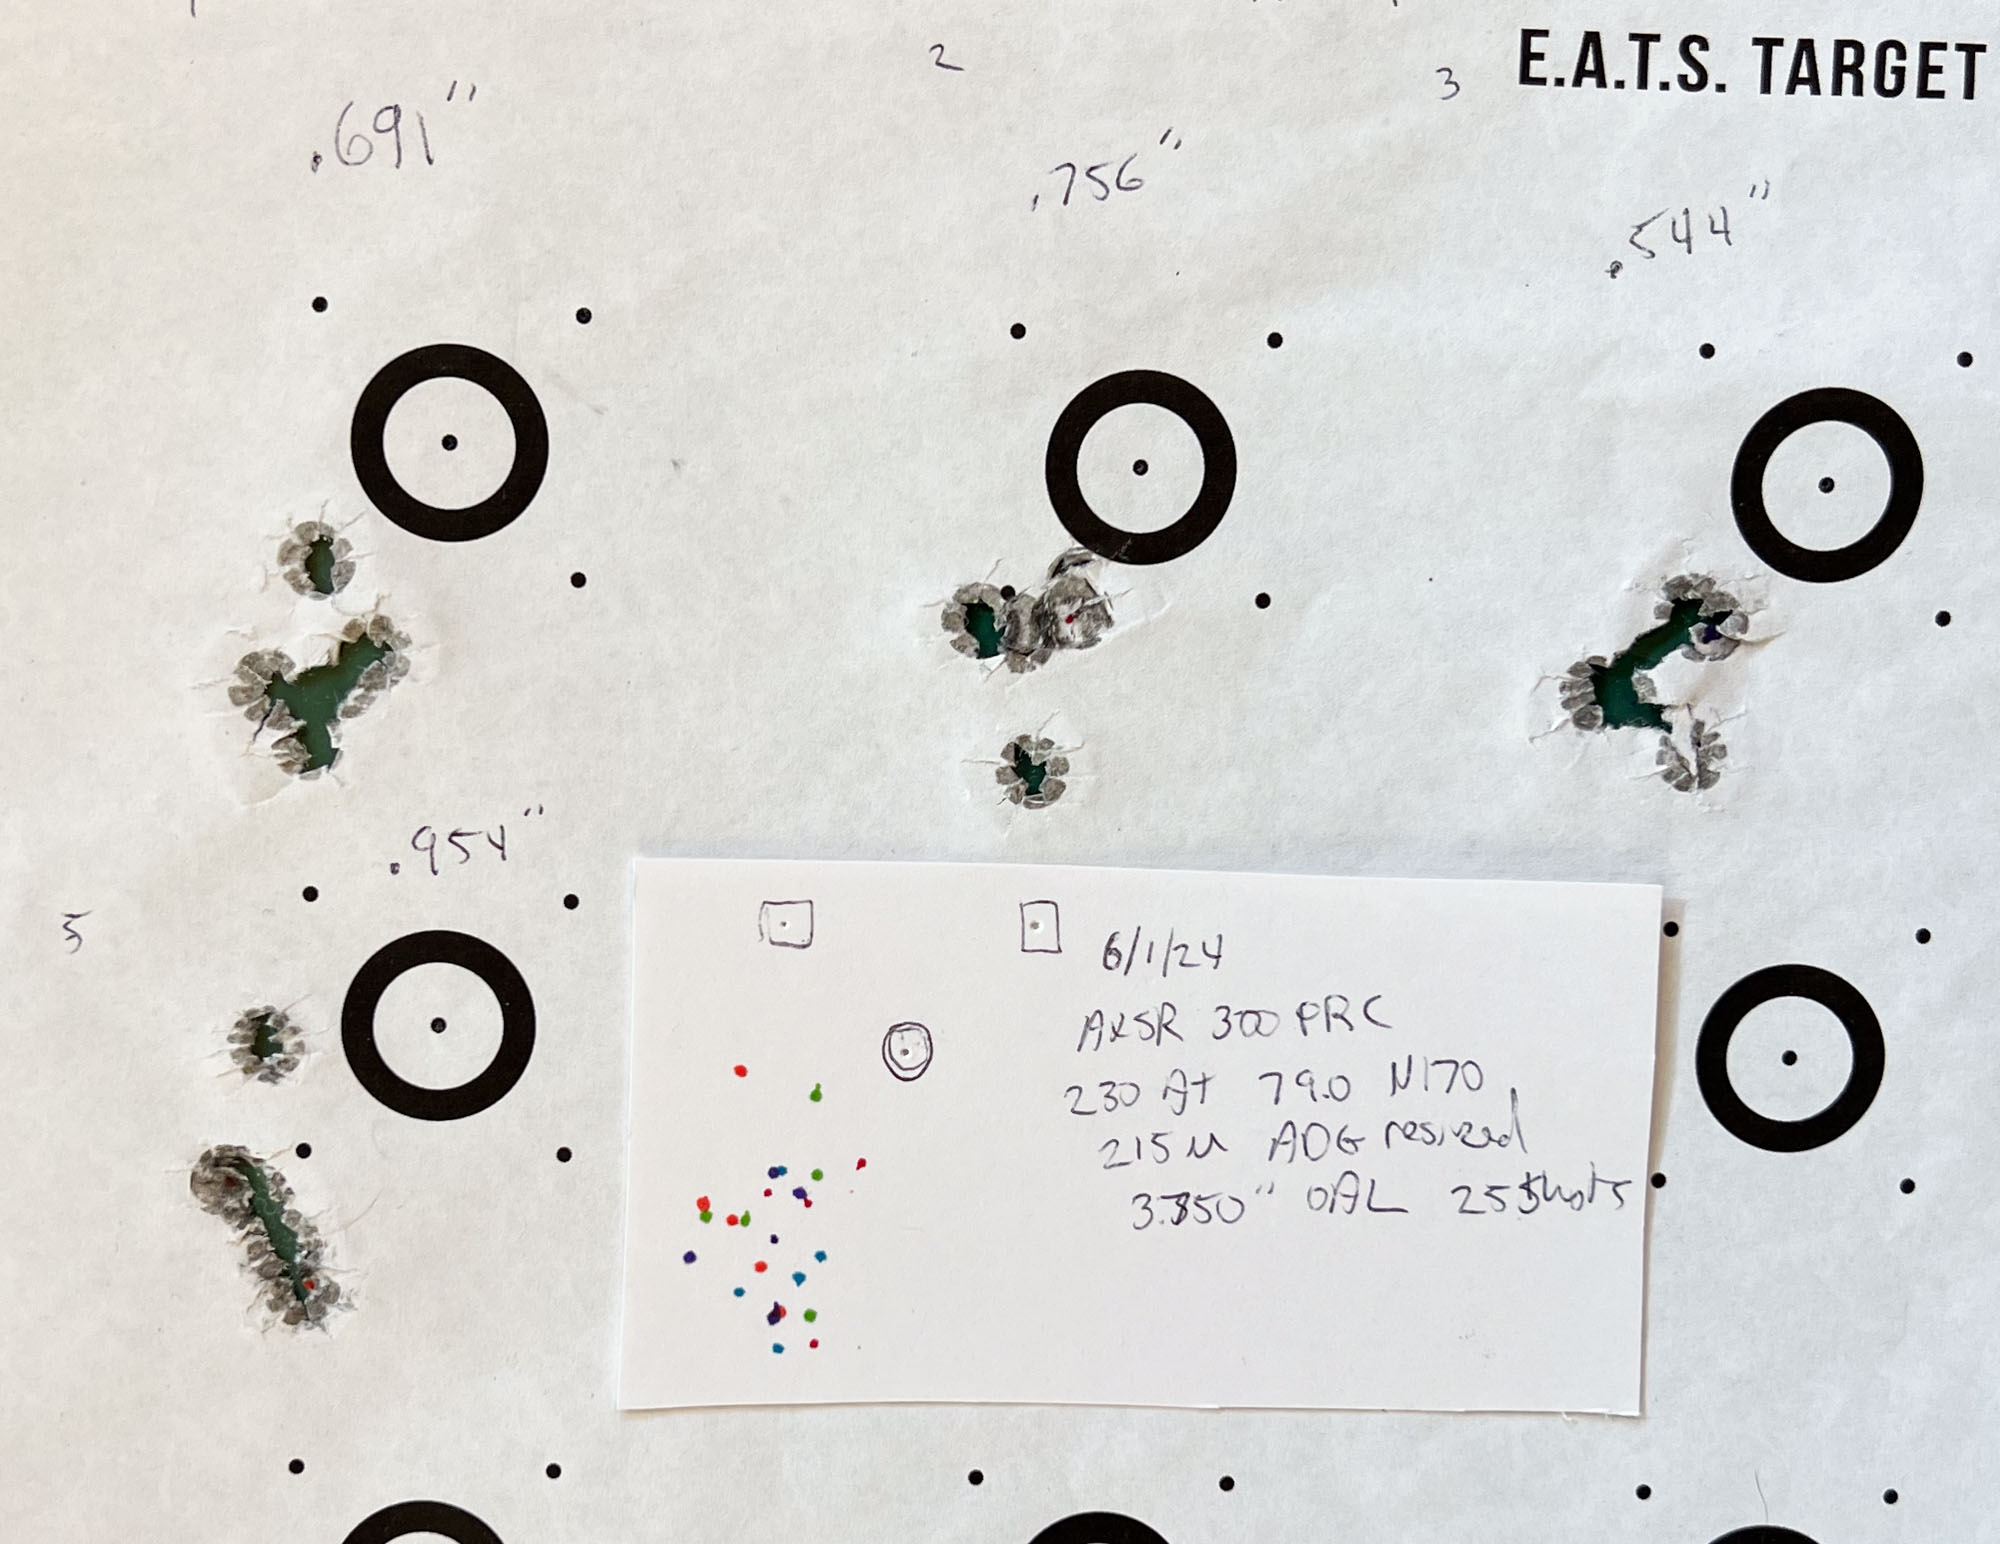
To make this painless, shoot a target with a series of aiming points that naturally line up horizontally and vertically. The E.A.T.S. Target I developed is a good example. The main aiming circles are on a grid, plus it has smaller reference points that let you accurately input your point of aim (POA), as well as the reference marks that are one inch apart, which the apps need to calculate group size.
One version of the E.A.T.S. Target has 12 aiming circles, while the other has eight (click the links to download and print these targets). With rifles that shoot tight, the 12-circle version is a good option, while rifles with a more relaxed notion of precision will find the 8-circle target more suitable. (The name stands for Extremely Advanced Technical Sight-In Target, which, yes, is tongue-in-cheek.)
You can do this with any target with aiming points on a grid, however. It just requires extra care to keep everything lined up correctly so that your aggregate data is accurate.
- Download the 8-circle E.A.T.S. Target here (PDF)
- Download and print the 12-circle E.A.T.S. Target here (PDF)
Aggregating 20-Shot Groups Step by Step
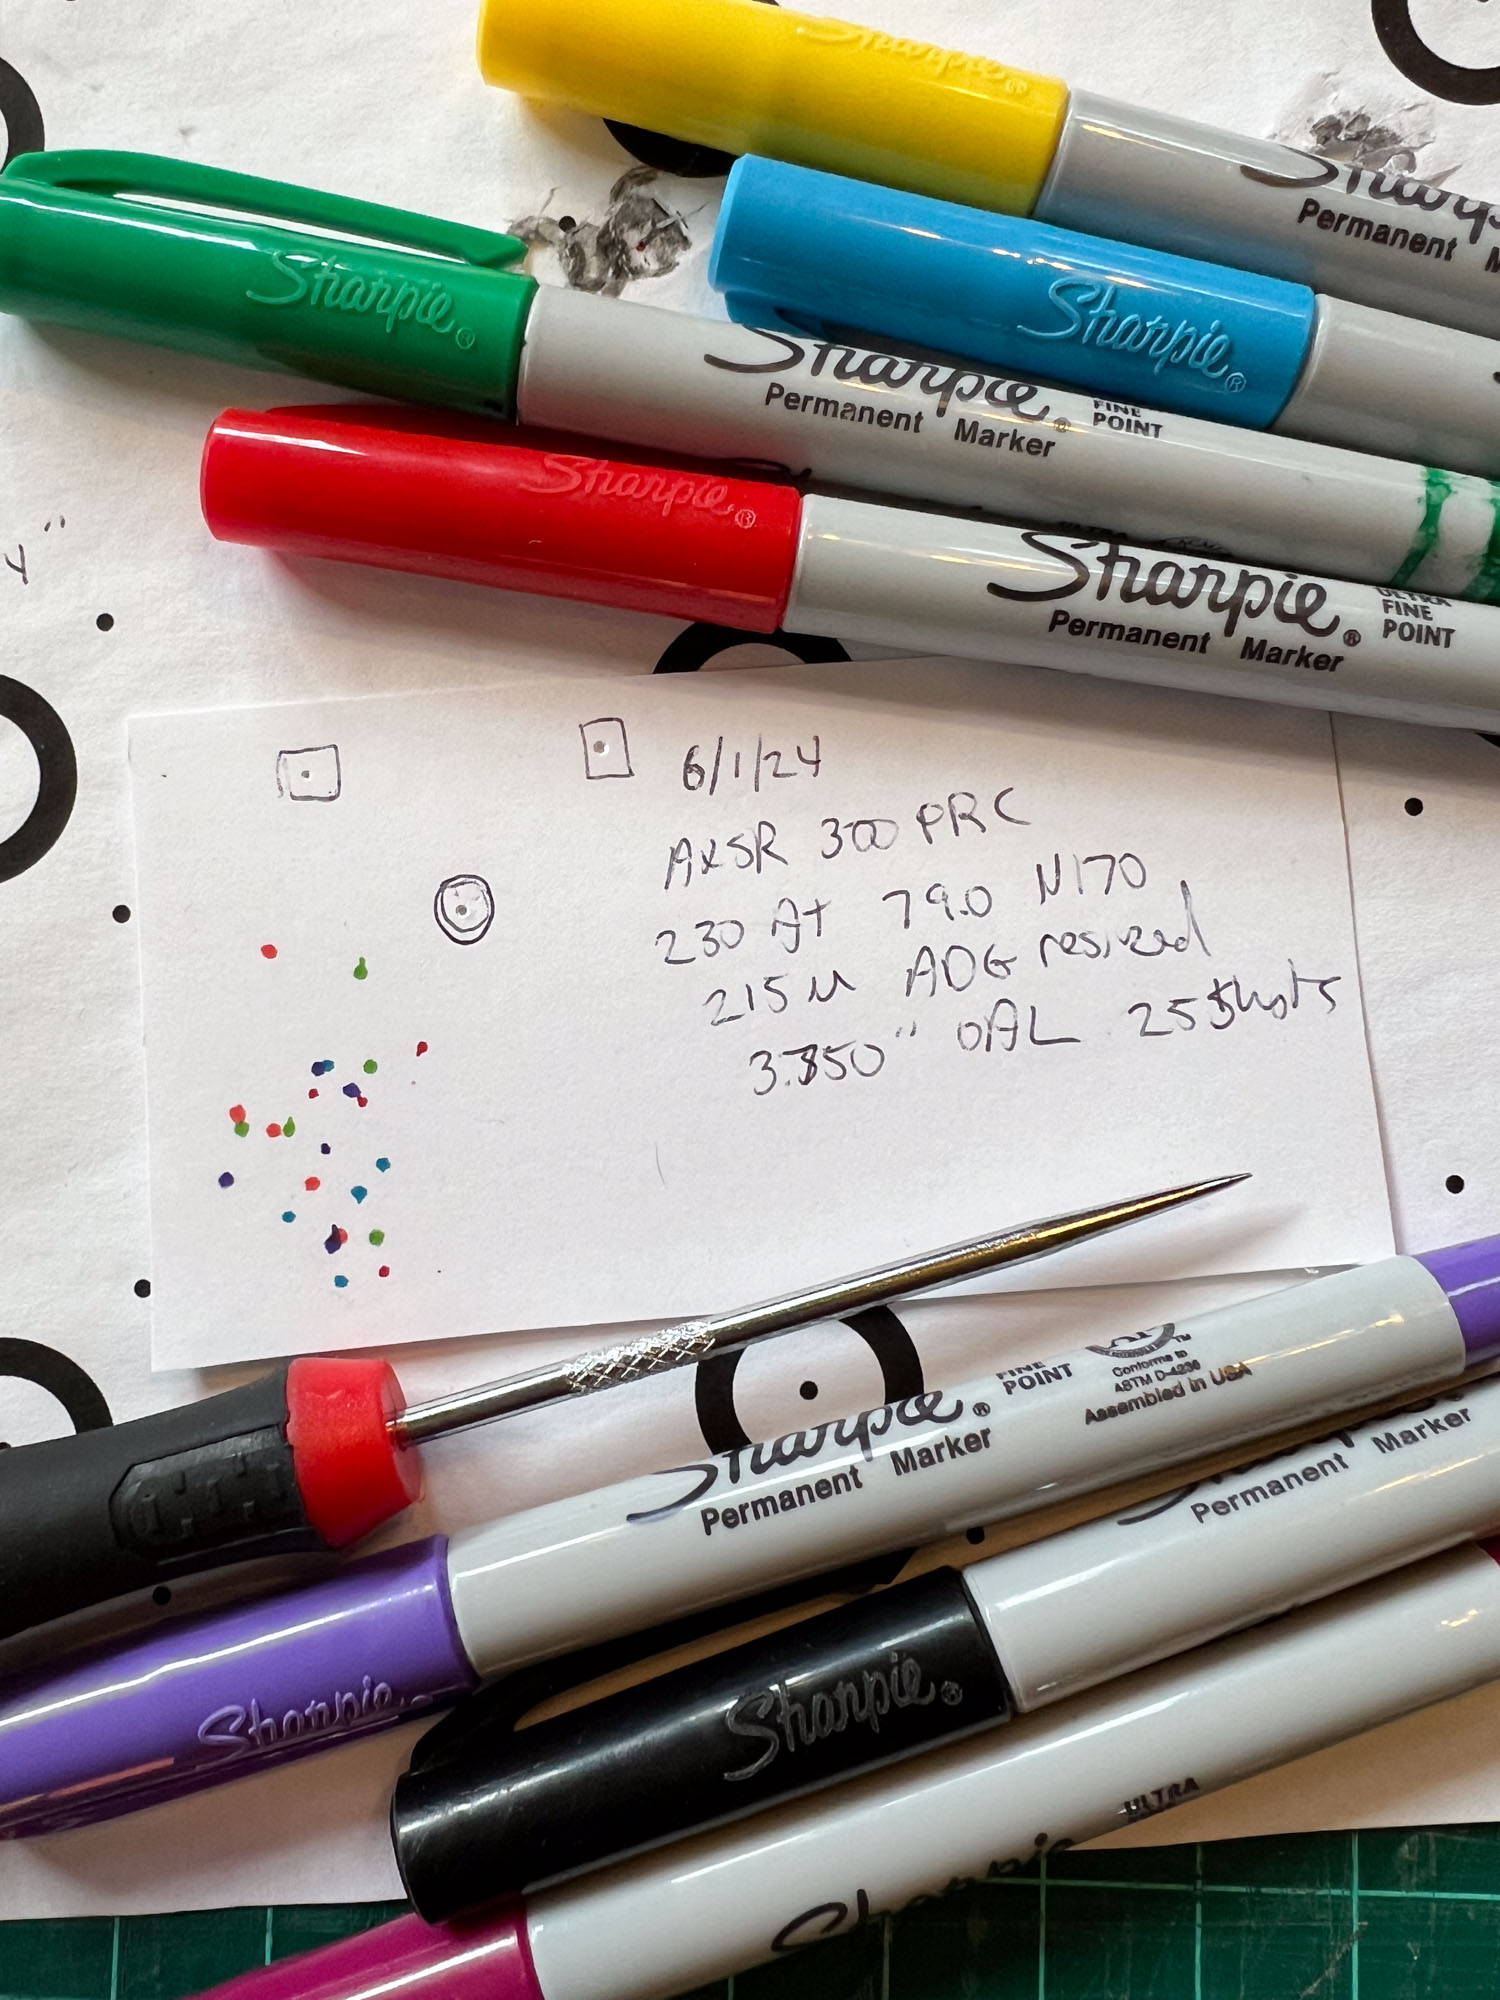
For this project you’re going to need your target, a clean sheet of paper, something pointy to poke holes with, and some fine-point markers. It helps if your target and the sheet of paper are the same size, which is why I like using targets printed on standard 8½ x 11-inch sheets of paper. A soft mat underneath both sheets also helps.
John B. Snow
Poke Some Holes
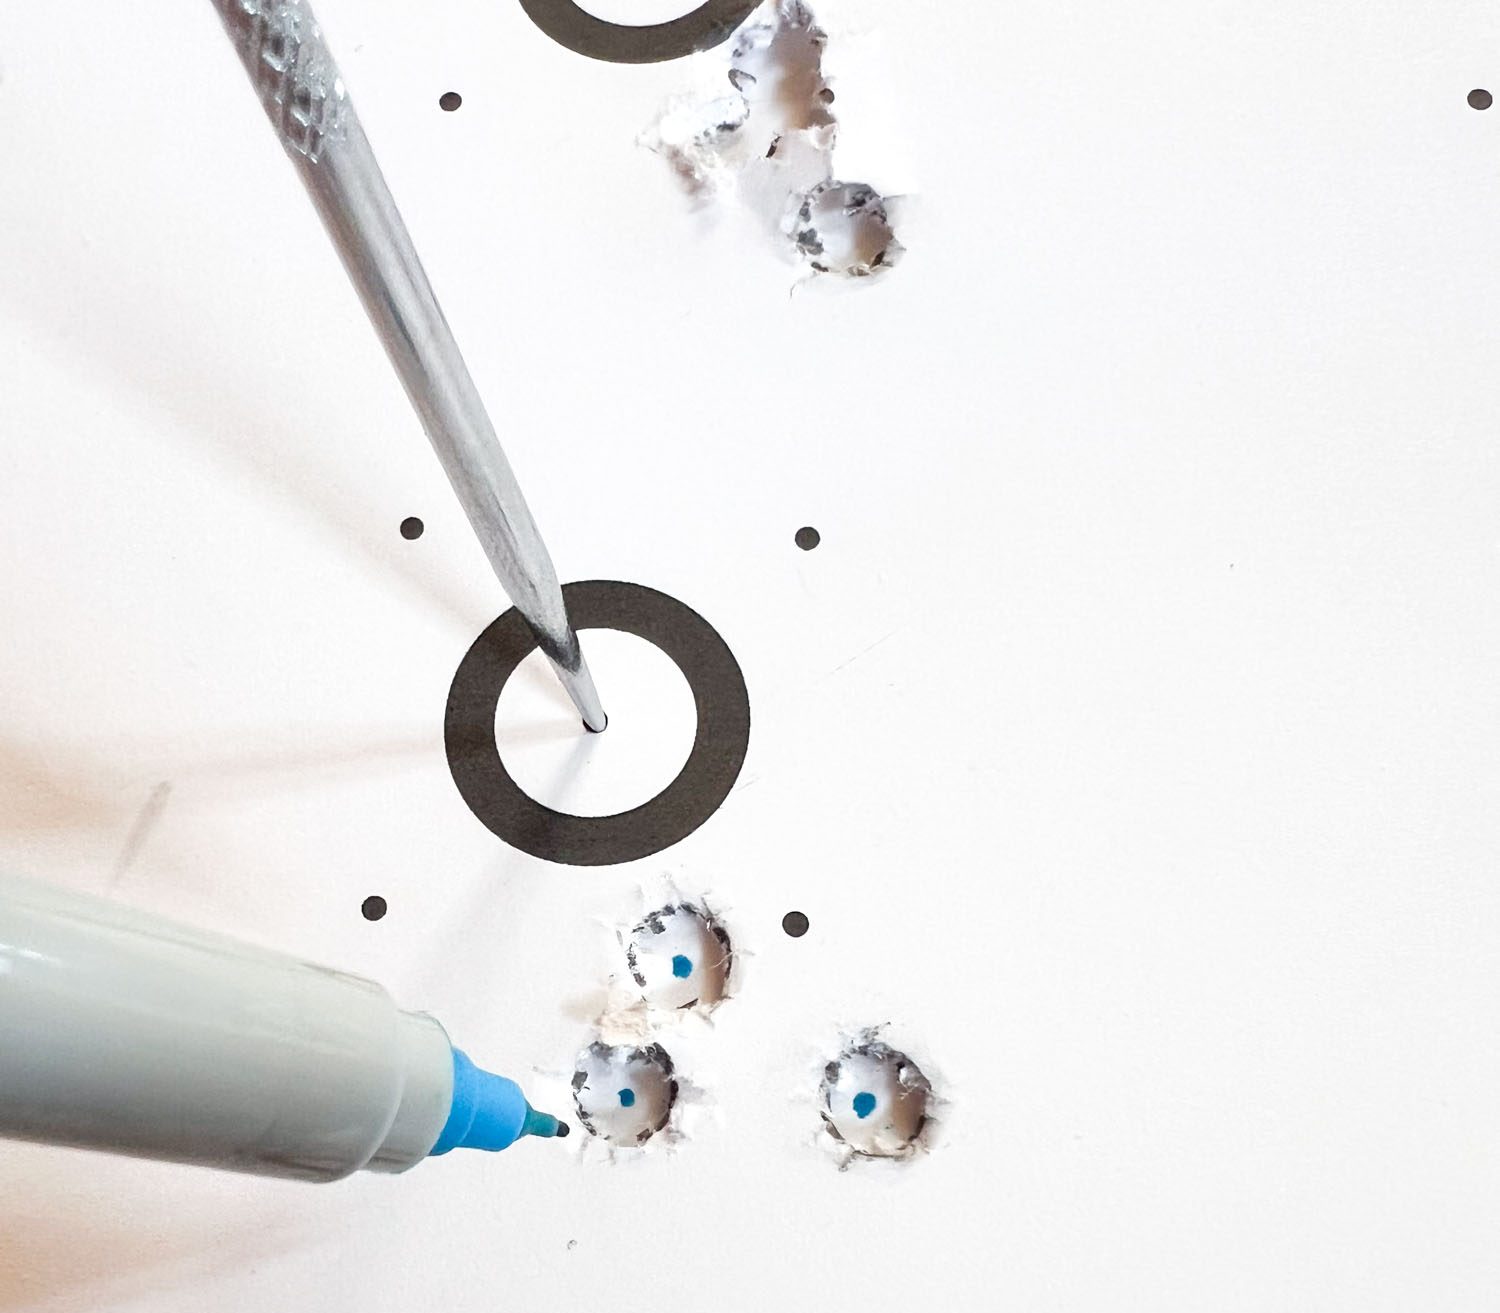
With your target on top of your clean sheet of paper and the edges of both sheets lined up, use your pointy object to poke a hole through your aiming point and into the paper below. Do the same by poking holes through the 1-inch reference marks too. (A small ice pick, a nail, the point of a drafting compass, or an inexpensive hook and pick set, which is what I use, will do.)
Mark Your Groups
With your target still overlaying the sheet below, use a fine-point marker to mark the center of each shot of your first group. (This group is the one that corresponds to the aiming point you poked. It doesn’t need to be the first group you shot.)
Next, separate the target and underlying sheet and poke a hole in the aiming point of another group — for this and subsequent groups, only pierce the target. Use your pokey tool to line up that aiming point with the existing aiming point on the underlying sheet and line up at least one edge of the sheets for a second reference point. Then mark those shots with a marker.
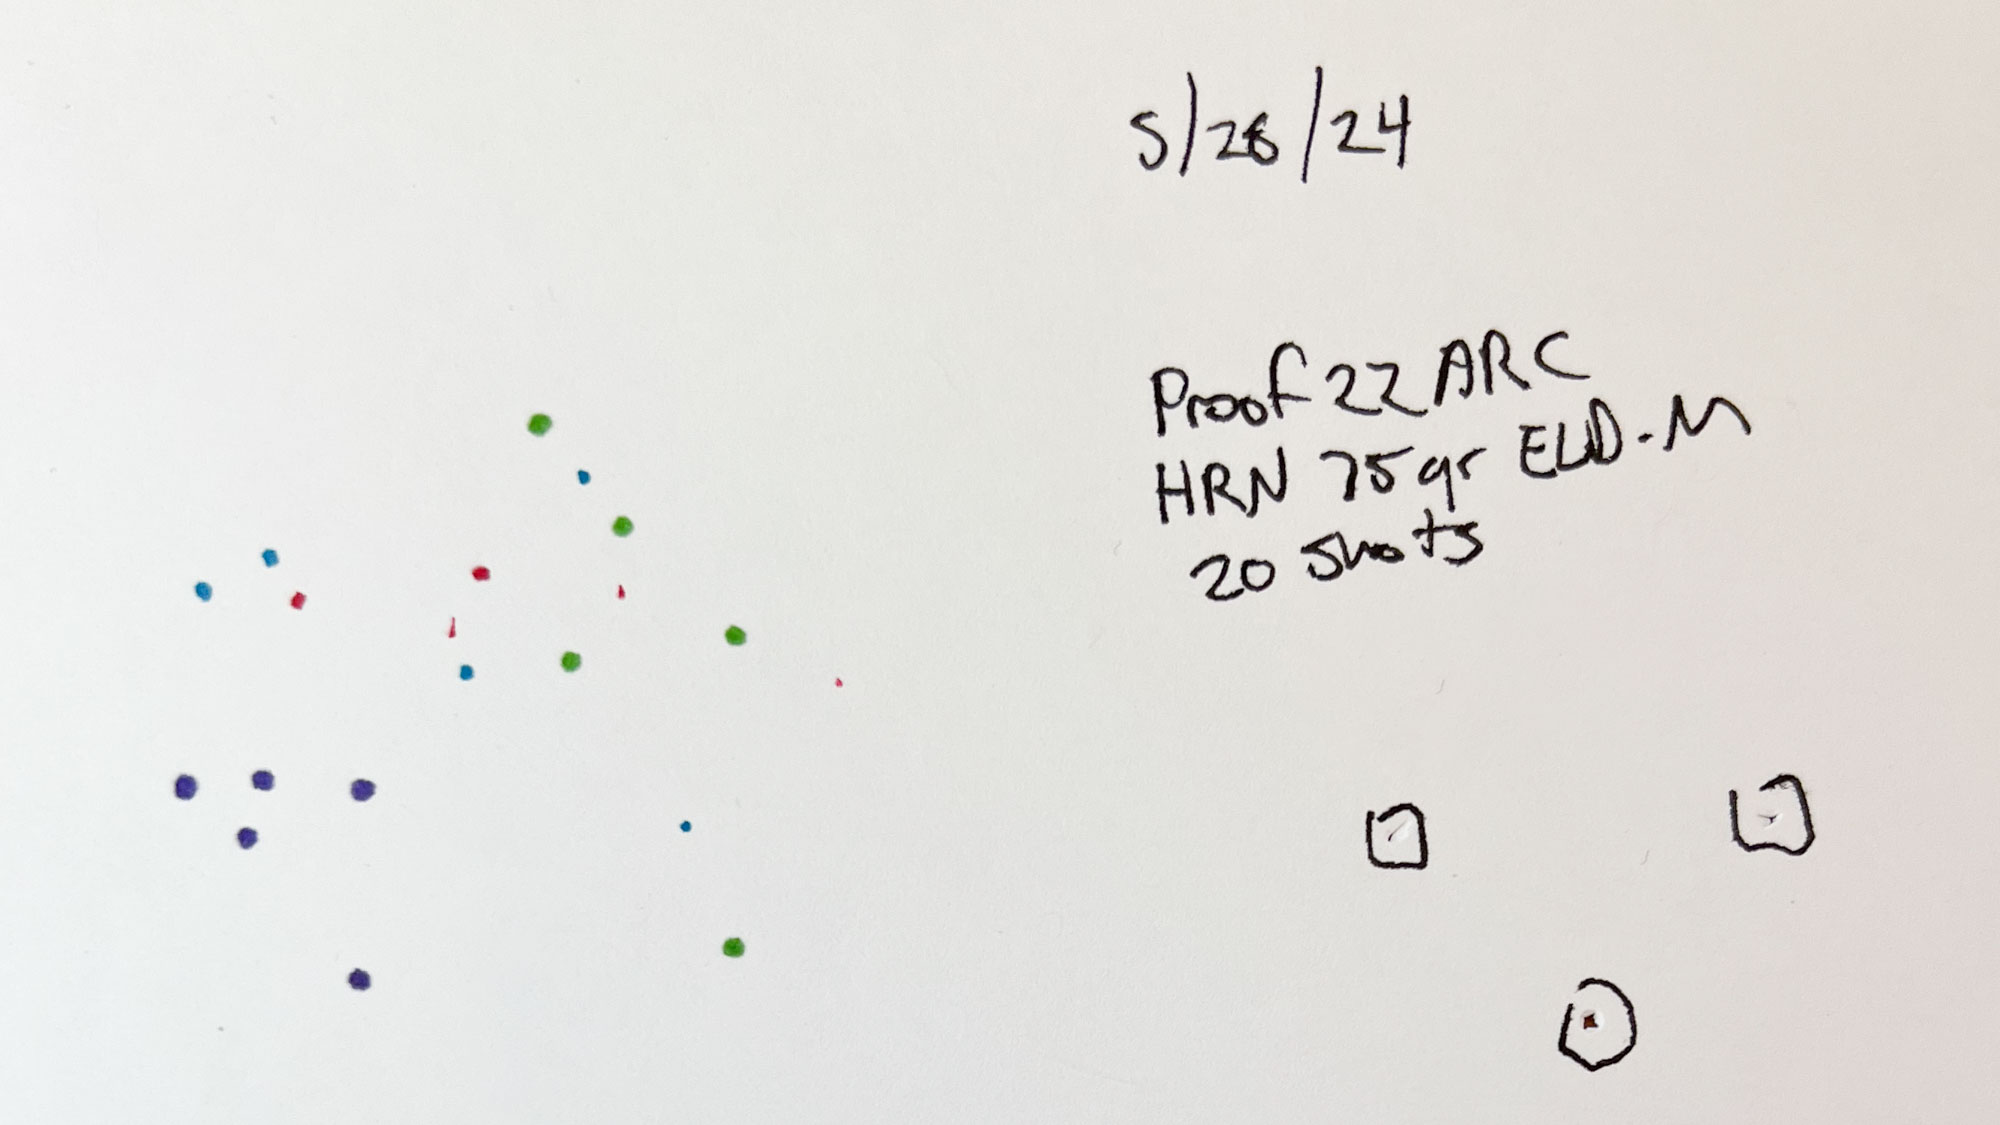
I like to use different colored markers for each group because it gives a great visual representation of how each group relates to the aggregate whole. You don’t need to do this, but I find it instructive.
Repeat this process until all your shots are plotted on the paper around the common aiming point.
How Many Shots Per Group?
This might be the coolest thing about the technique: It doesn’t matter whether you shoot 5-shot groups, 3-shot groups, or one shot each at 20 different aiming points. Once you overlay the data, the results are remarkably consistent.
So you can do four 5-shot groups (which is what I typically do), five 4-shot groups, or seven 3-shot groups. Once you input all the information and get that aggregate data the results will essentially be the same.
John B. Snow
Analyzing Aggregate 20-Shot Groups
To make this process go more quickly, I draw a circle around the hole indicating the POA, and squares around the 1-inch reference marks. If you are using a target that doesn’t have one-inch reference marks, you can set your digital calipers to one inch and punch crisp reference holes next to your group.
When you open the 4DOF app and go to the Group Analysis Tool you hit the plus (+) mark in the upper right corner and you’ll be prompted to take a photo of your target — in this case our sheet of paper with the 20 dots on it. The Ballistic X app works in much the same way.
You want to make sure your camera is parallel to the target when taking the picture. If it is tipped, the image will be distorted and your results won’t be as dependable. Something like a hobby cutting mat that has grids on it helps you line up the camera correctly and makes poking the reference holes easier while protecting your work surface.
John B. Snow
In either app you’ll be prompted to identify the aiming point, the two marks that are 1-inch apart, and each impact. You’ll also be asked to set the diameter of the bullet.
Once you enter the reference marks and all the shots, the app calculates the overall group size, the mean radius, and how far the center of the group is off from your point of aim.
Adjusting Your Zero
In the analysis of the data the apps provide the horizontal offset (elevation) and vertical offset (windage) between the center of the group and the point of aim. You use that data to adjust your scope to establish your zero.
For example, I recently went through the process of breaking in a couple barrels for a long-range shooting competition. I put 100 shots of factory ammo through each, cleaning them at regular intervals. I measured the final 20 shots with the group analysis tool, which told me I had a 1.35-inch group that was .33 inches low and 1.13 inches to the left.
If I were to zero based on that, I would move the scope up .1 mil (.36 inches) and bump the windage .3 mil (1.08 inches) to the right and the rifle would be essentially dead on at 100 yards.
Depending on how persnickety you want to be, after getting your scope to line up the POA and POI as close as possible, you can input the remaining horizontal and vertical offset (in this example .03 inches high, and .05 inches left) into your ballistic calculator for more finely tuned shooting solutions.
| Rifle | Ammo | 5-Shot Group Avg. | 20-shot Group ES | Mean Radius |
| Sako TRG 22 A1 | Sig 140-gr OTM | 0.447 in. | 0.68 in. | 0.21 in. |
| Browning X-Bolt 2 | Fed 140-gr CtrStk | 0.605 in. | 0.68 in. | 0.24 in. |
| Bergara Premier Series MgLite | Ber 130-gr HOTM | 0.580 in. | 0.82 in. | 0.25 in. |
| Sako 90 Adventure | Sak 120-gr CTX | 0.585 in. | 1.13 in. | 0.25 in. |
| CVA Cascade LRH | Ber 130-gr HOTM | 0.746 in. | 1.02 in. | 0.31 in. |
| Savage Arms 110 Klym | Fed 140-gr CtrStk | 0.832 in. | 1.17 in. | 0.33 in. |
| Proof Elevation MTR | Hrn 62-gr ELD-VT | 0.869 in. | 1.40 in. | 0.34 in. |
| Stag Arms Pursuit | Fed 140-gr Fusion | 0.963 in. | 1.09 in. | 0.34 in. |
Assessing Rifle Precision
If you adopt this technique don’t be surprised if you start to think about rifle precision in a different way. Referring to a rifle as ½ MOA or sub-MOA begs the question: under what circumstances?
If we’re talking about a rifle capable of producing individual groups from time to time that are less than .5 inches or 1 inch (or whatever then standard is), then sure — those rifles exist. I own many myself. But that isn’t really a good yardstick to predict how a rifle shoots time and again, because as we’ve seen once you overlay the groups into a 20-shot (or larger) cluster, a different picture emerges. And in that world, ½ MOA rifles are as common as unicorns.
It might hit us in the feels to admit that the rifle we always swore was sub-MOA really isn’t, but what we get in return is worth the bruised ego. We’ll know where the rifle actually shoots (the center of the group), how much to adjust the scope to get our POA and POI lined up, and, with the mean radius, we have a metric to help predict how the rifle will shoot the next time we line up on an animal or target. (Mean radius is predictive in the sense that it indicates, on average, how far from the point of aim our shots will land.)
Why Averaging Small Numbers of Groups Can Be Misleading
Most firearms reviews include accuracy data based on average group sizes. For years at Outdoor Life we’ve adhered to a protocol of averaging multiple (often 10 or more) five-shot groups with a particular load and then repeating that with a variety of ammo — a standard that far exceeds most gun reviews.
But it turns out that even our rigorous standard isn’t fully reliable, since five shots just isn’t enough data.
| AI AXSR 300 PRC | 5-shot Group Avg. | 20-shot Group ES | Mean Radius |
| Barrel 1 | .775 in. | 1.350 in. | .31 in. |
| Barrel 2 | .904 in. | 1.250 in. | .34 in. |
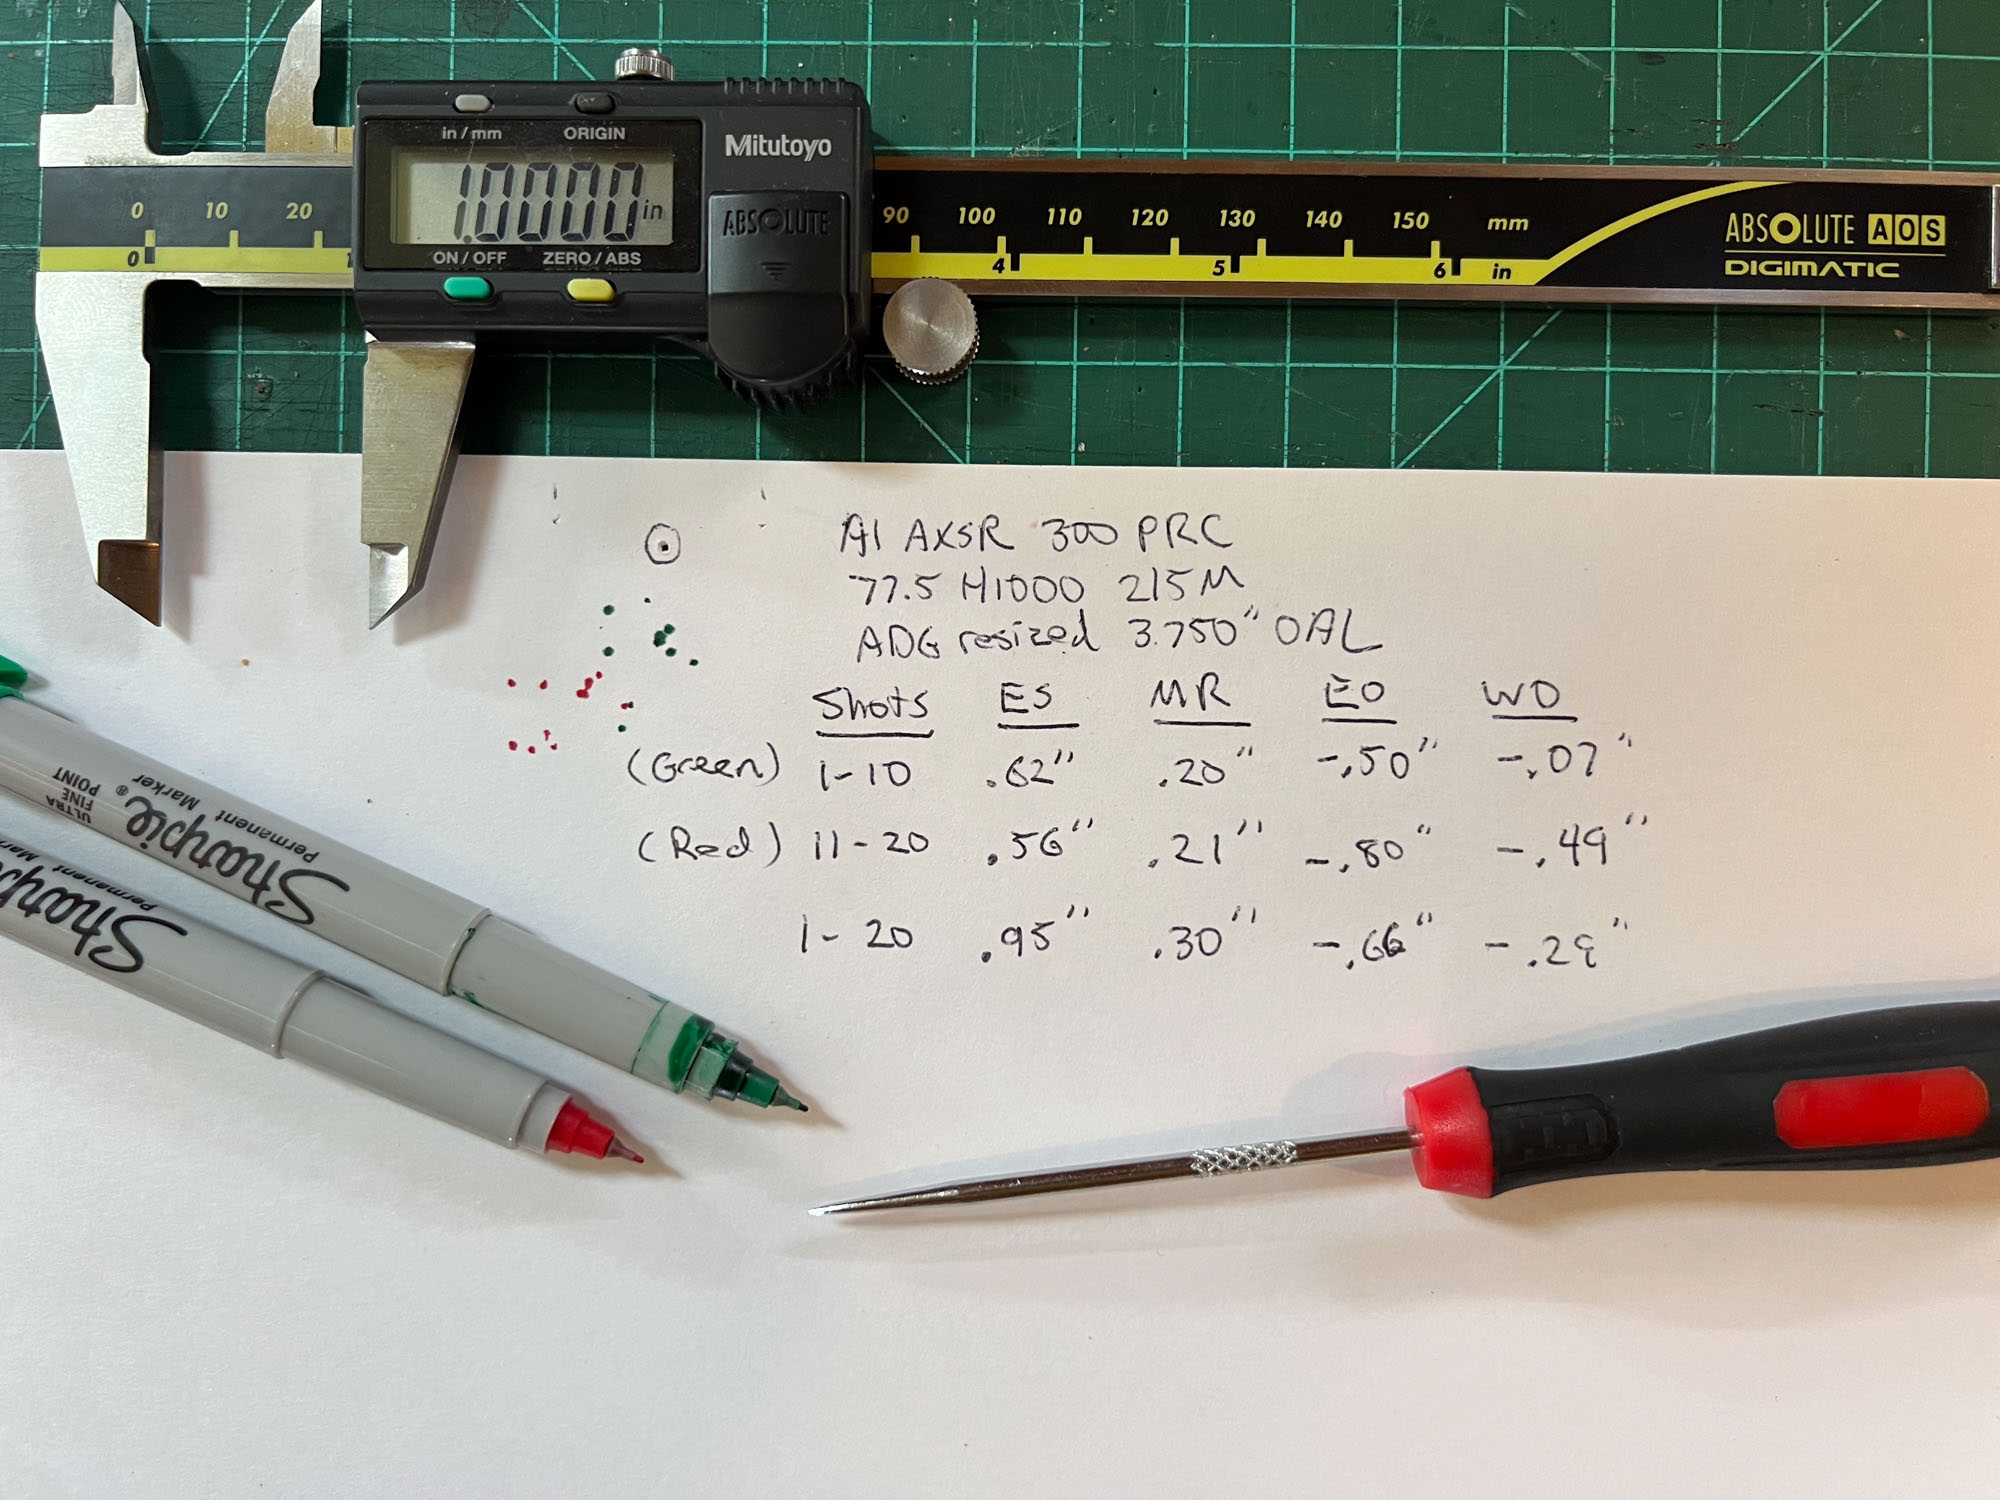
Here’s an example based on the barrel break-in I mentioned above. After I put 80 rounds through each barrel (mine and my partner’s), I shot a final string of 20 through each. The average group size of four 5-shot groups was .775 inches with my barrel (Barrel 1). My partner’s barrel (barrel 2) averaged .904 inches. In the old way of looking at things, my barrel was clearly shooting better.
But when I aggregated the data into 20-shot groups, a different picture emerged. My partner’s group measured 1.250 inches, while mine was 1.350 inches. Very close, but suddenly my barrel was the one shooting slightly worse!
Now when I went back and averaged all 20 of the five-shot groups I had put through each barrel, it became more interesting still. Over the entire break-in process, my barrel’s groups averaged .974 inches, while my partner’s averaged 1.036 inches: A difference of just .061 inches — for practical purposes they were identical.
I wasn’t surprised since I was shooting the barrels on the same rifle — a switch-barrel Accuracy International AXSR — using barrels that were made at the same time from the same batch of steel and then chambered with the same reamer.
The muzzle velocities of the barrels bore out their identical nature. The 100 break-in shots through my barrel averaged 2988 fps, while my partner’s averaged 2985 fps.
This is what you would expect to see from an exercise like this, but you need to have valid sample sizes — calculating 20-shot groups (or larger), averaging the velocities of 100 shots (which is what I did here, but shooting 20 shots is plenty to determine a good MV), or averaging 20 five-shot groups, rather than just averaging five or fewer — for the results to become manifest.
Using Bigger or Smaller Data Sets
Even with 20-shot groups, there’s still a statistical margin for error. For a true zero and a true sense of how well your rifle shoots, 30 shots is better and 50 is pretty much as good as it gets. Shooting that much is generally impractical given the time and expense involved, but nothing is stopping you from going that route if you want.
Putting some rough numbers to this, if you gather multiple 20-shot data sets with a rifle, you can expect a swing of perhaps 15 percent in your results. For example, a rifle that shoots a 1-inch aggregate group on average might produce groups from .850 to 1.15 inches on other occasions. With a 30-shot data set that swing will dip to about 10 percent, while a 50-shot data set will have percentage swings in the low single digits.
Now you can also do this with less data. Even overlaying four 3-shot groups for 12 shots total, will get you closer to a true zero than chasing holes around on a target like I used to do with my .30/06. The same goes for three 5-shot groups.
But at this point you’re so close to a data set that’s valid, so why not put a couple more groups downrange to be sure? If you’re doing this the “old way,” you’d likely shoot a whole box of ammo chasing holes around the target anyway. This process gives those extra shots meaning.
John B. Snow
Diagnosing Problems
Another benefit to this improved way to sight in a rifle is that we can potentially uncover underlying issues with the firearm or optic.
Once you get a quantity of shots on paper, the resulting group should be round (or at least roundish, since 20 shots is still below the 50-shot threshold for ironclad statistical accuracy). If the group is noticeably linear, you might have a bedding issue, loose fasteners, or some other gremlin in your system. Looking at individual 3- and 5-shot groups, you wouldn’t be able to ascertain this since there isn’t enough data.
Walking POI?
This technique can also be used to confirm (or dispel) the idea that your barrel walks as it heats up. It is common for people with lightweight barrels to insist that their barrel is good for three shots and then starts to shift its POI as it gets hotter.
You can test this by shooting a series of 3-shot groups from a cold barrel and creating the aggregate 20-shot group. Then, at a later time go ahead and shoot 20 shots in succession (switching aiming points every three or five shots) and see what happens. If you use different colored markers for each group, you can tell whether the shots are drifting in one direction or another, plus you’ll see if the mean radius and group ES is notably different.
Example of a Lightweight Barrel Shooting 3-Shot Groups vs. 5-Shot Groups
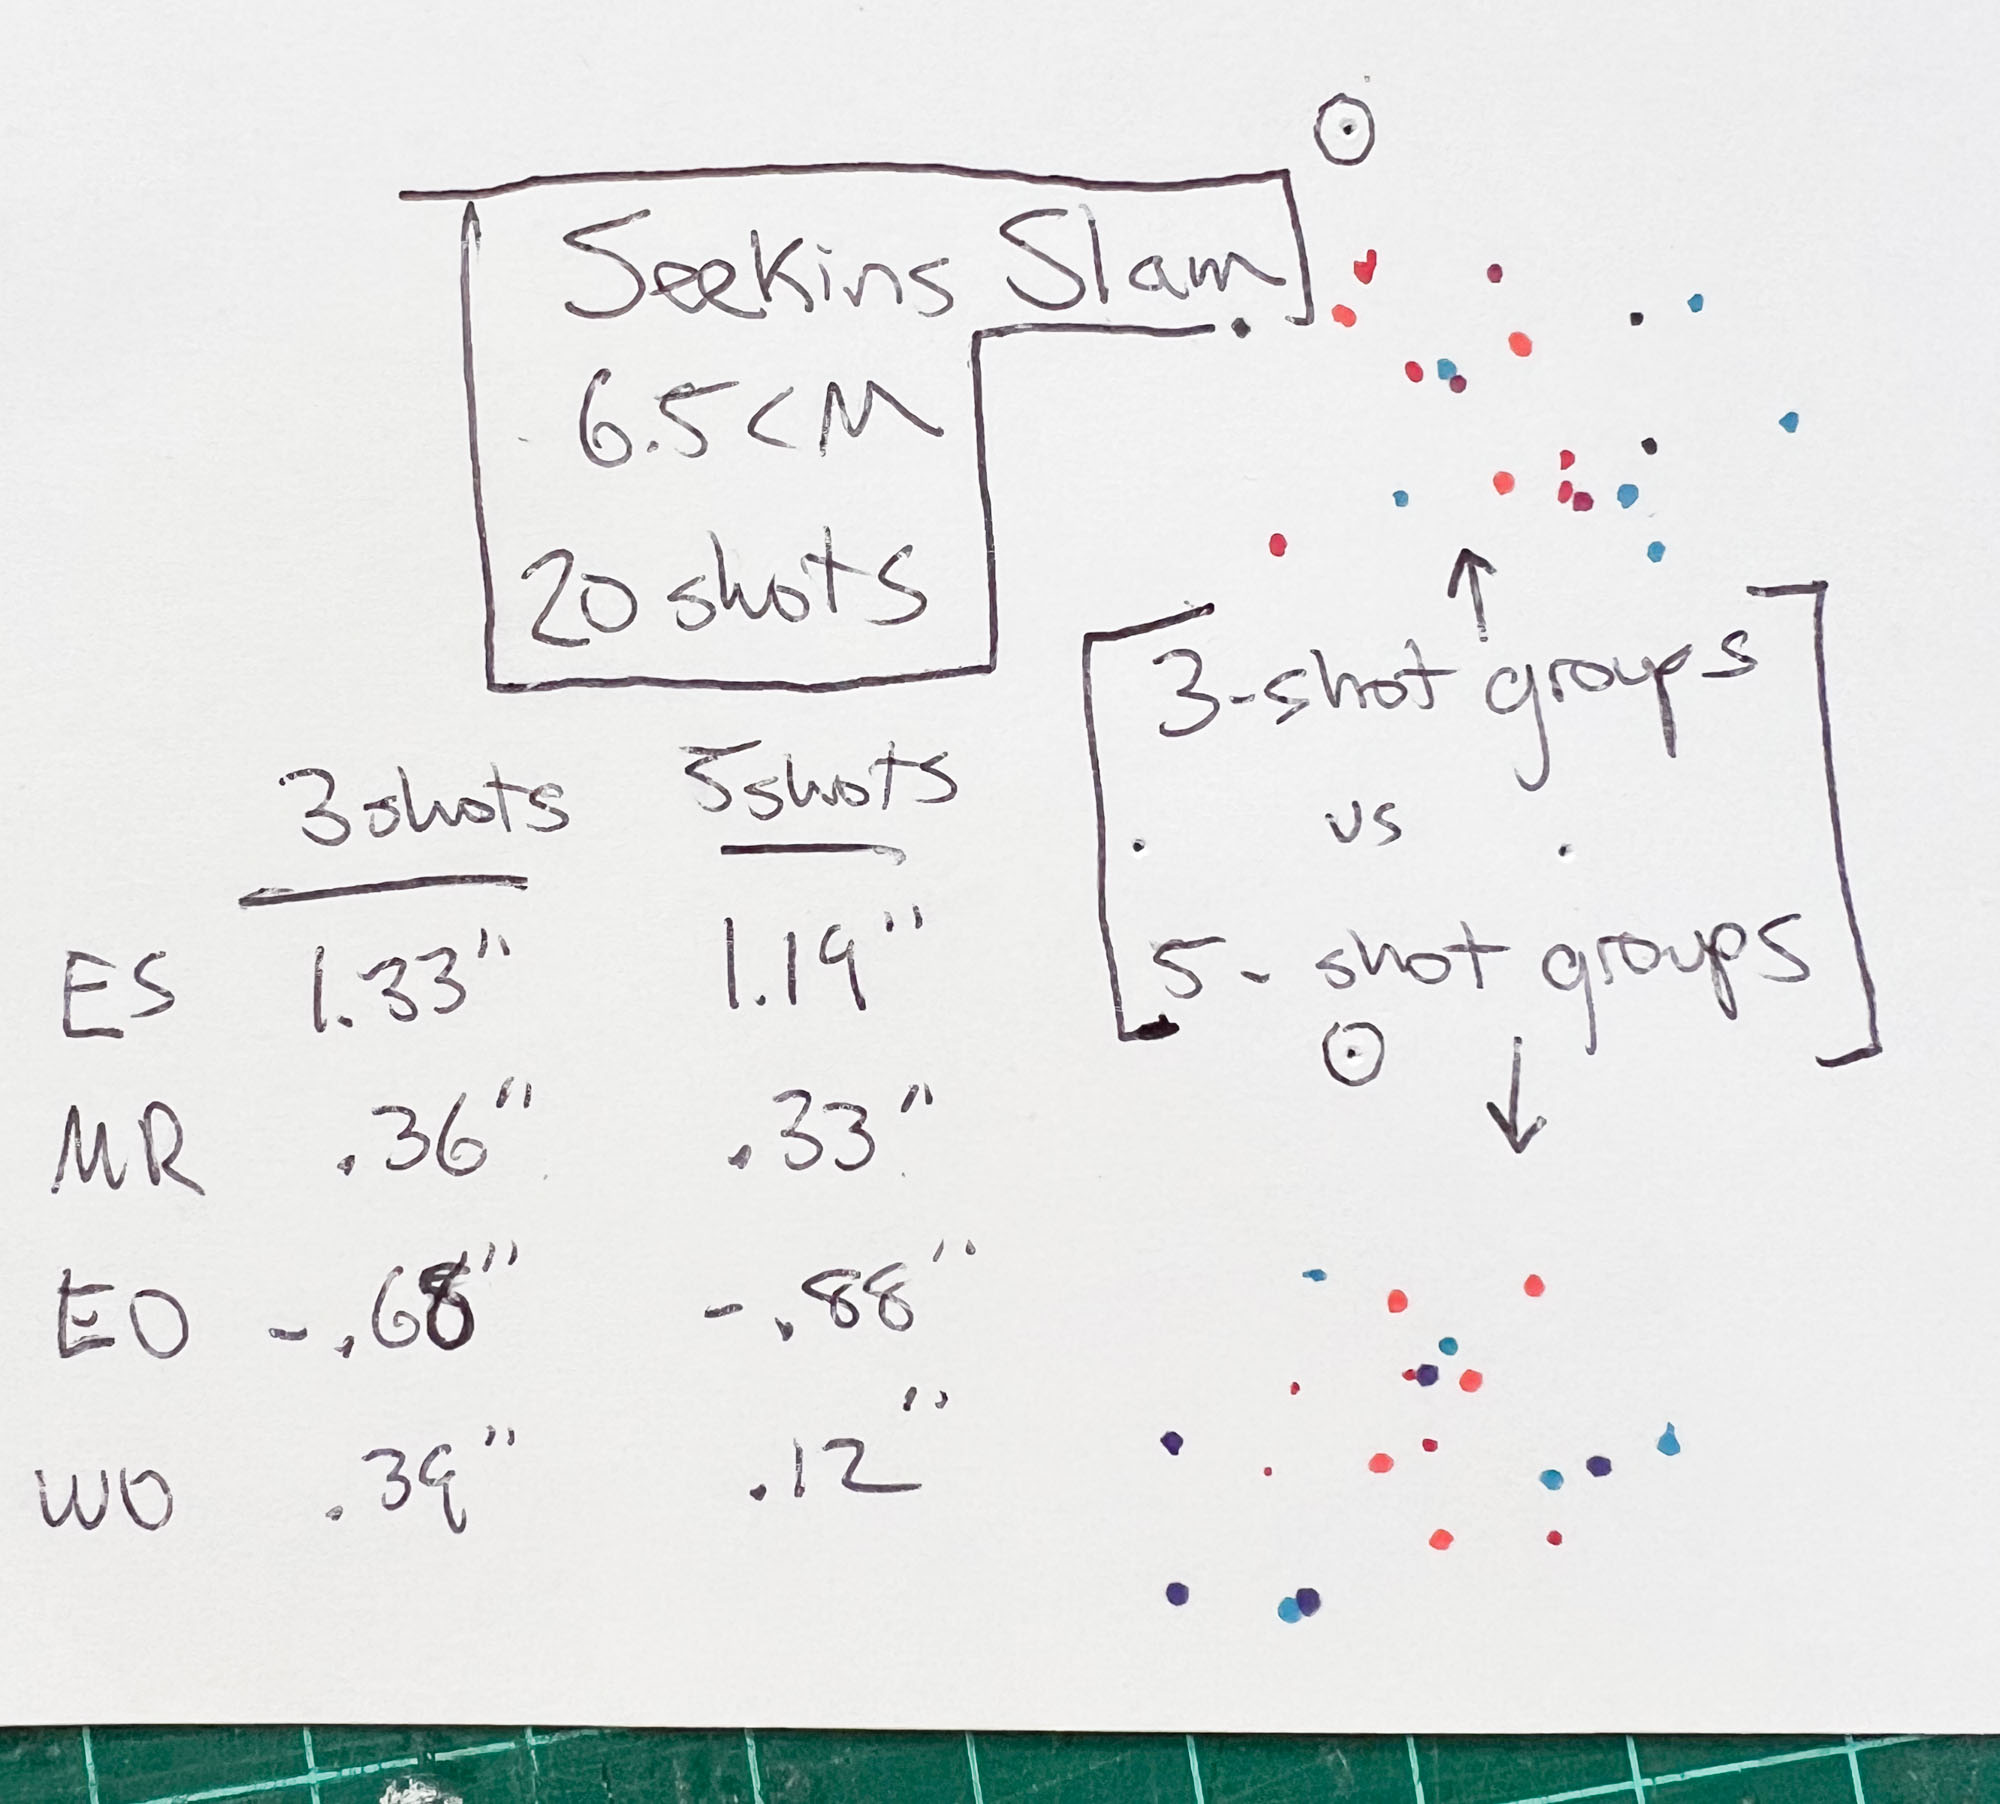
To explore whether a lightweight barrel “opens up” after three shots because it gets hot, I shot a Seekins Havak Slam in 6.5 Creedmoor with 140-grain match bullets. I shot 20 shots with 3-shot groups, and then 20 shots with 5-shot groups letting the barrel thoroughly cool between groups.
John B. Snow
Rifle: Seekins Havak Slam, 6.5 Creedmoor
Ammo: Sig. 140-grain HPBT
| Group Size | 3-Shot Groups | 5-Shot Groups |
| Avg. Group Size | .588 in. | .819 in. |
| 20-Shot ES | 1.33 in. | 1.19 in. |
| 20-Shot MR | .36 in. | .33 in. |
| Elevation Offset | .68 in. low | .88 in. low |
| Windage Offset | .39 in. right | .12 in. right |
As you can see, the 3-shot average of .588 inches is impressive, and when compared to the .819-inch 5-shot group average it seems to support the idea that the light and deeply fluted barrel “opens up” as it gets hot.
But once the shots are plotted on paper, we see that the aggregate 20-shot group was actually a bit tighter with 5-shot groups (1.19 inches vs. 1.33 inches), though the mean radius was essentially identical.
In terms of zeroing the rifle, both groups indicate that we should come up 3 clicks (.75 inches), while the windage should be moved one click to the left. That’s a solid zero you can count on the next time you shoot.
Tips and Tricks for the Improved Way to Sight in a Rifle
As my colleague staff writer Tyler Freel and I have delved deeper into this method, we’ve refined our approach and have learned a few things along the way.
John B. Snow
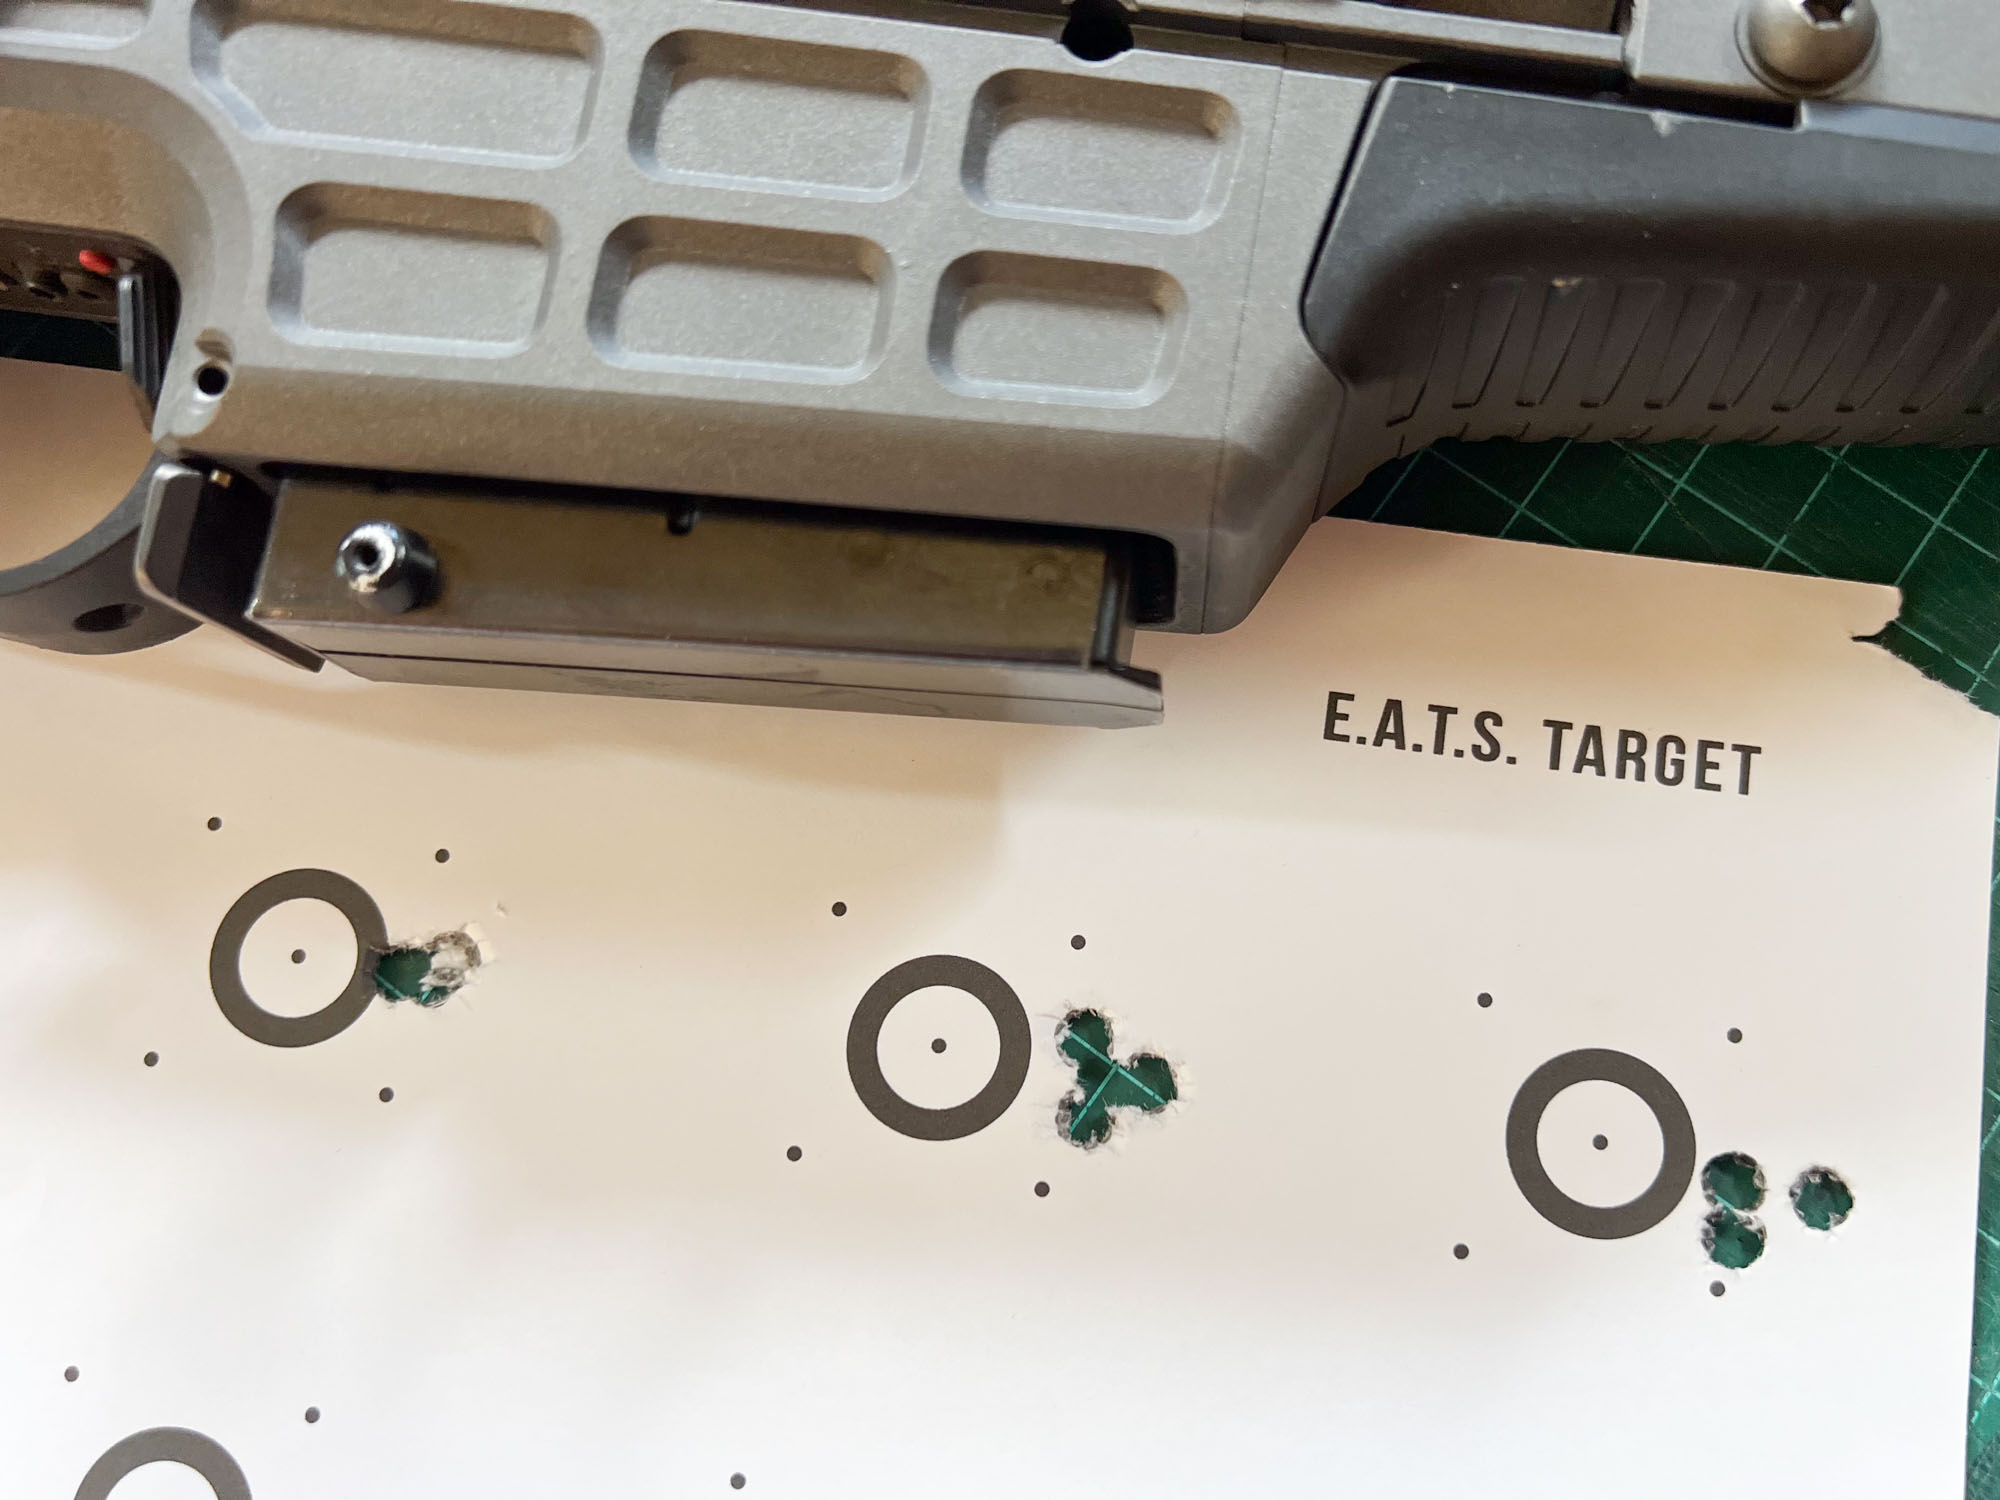
- Shoot Smaller Groups: Depending on how accurate your rifle is you might want to shoot smaller groups. With extremely accurate rifles you can sometimes lose the individual shots in a tight cluster of holes making shot identification and marking difficult. Going to 3- or 4-shot groups helps with this.
- Select a Smaller Caliber Size: Entering all the shots into the app can be complicated when the dots on the paper are clustered near each other. Each shot you mark places a circle on the image the size of your bullet diameter, and those overlapping circles can obscure some of the impacts you haven’t yet logged. If you set the bullet diameter size to the smallest caliber (currently .223/5.56) the circles are less prominent. Because the app gathers data based on the center of each shot, the size of the circle doesn’t matter.
- Use Quality Paper: Regular printer paper works for these targets and this method, but a heavier weight cardstock is easier to work with, resists wind and rain better, and will yield more accurate results.
- Print — Then Check — The Targets: If you print out the E.A.T.S. Targets I developed make sure your printer is set to scale at 100 percent. This will ensure the outside reference dots are 1 inch apart. Double check your printed target with calipers to be certain.
Download the 8-circle E.A.T.S. Target here (PDF)
Download and print the 12-circle E.A.T.S. Target here (PDF)
- Use Calipers to Enter 1-inch References: If you shoot on a target that doesn’t have a verifiable 1-inch grid or marks you can set your caliper to 1 inch exactly and the use the points on the jaws to punch holes in the underlying sheet of paper where you are plotting your data.
- Entering Data In the Apps: When inputting shot data, the initial point of aim, or the 1-inch reference marks in the apps, it works better if you zoom in and hold the image while tapping the button that adds the information. This lets you control the position of the guides more precisely. If you try to line up the guide and then let go before hitting enter, the guide usually shifts slightly.
John B. Snow
Final Thoughts on How to Zero a Rifle
The biggest benefit to this method is that, ultimately, it will save time, money, and frustration for the person who wants an accurate picture of a rifle’s performance. Instead of looking at groups as individual items, this technique pools all the shots to create a data set that we can draw valid conclusions from. There’s a small learning curve to this technique, but with the availability of inexpensive group analysis tools it is a simple process to master.
The post A Better Way to Zero and Sight in Your Rifle appeared first on Outdoor Life.
Source: https://www.outdoorlife.com/guns/how-to-zero-a-rifle/


