Tips for Making Campsite Coffee & 6 Great Recipes

For most of us, coffee is an essential starter in the morning, especially during a camping adventure. Even those who don’t drink coffee usually love its smell wafting across a campsite. Combined with frying bacon and wood smoke, it’s an aroma that can’t be replicated anywhere else.
What’s the best way to make camping coffee? Well, that’s the source of prolonged debate among experienced campers. Everyone has a favorite recipe or technique, but if you have an open mind here are some you might want to try yourself.
Tips for Making “Perfect” Camp Coffee
Water Temperature
The ideal temperature at which to brew coffee is 200 degrees. The easiest way to accomplish this is to bring your water to a boil – which is 212 degrees Fahrenheit at sea level – and letting it cool off for about a minute.
One thing to remember, though, is that as you go up in elevation water begins boiling at lower temperatures. So if you’re in a high-elevation mountain camp, continue heating your water well above the boiling point to get the water to 200 degrees for the “perfect” cup of coffee.
Coffee to Water Ratio & Brewing Time
How strong and dark you like your coffee is a matter of personal taste, so the “perfect” cup of coffee is highly subjective. But a good starting point for most brewing methods is 2 tablespoons of ground coffee for every 8 ounces of water. Experimentation and lots of tasting are really the only way to develop the skills to brew the perfect cup.
The Right Grind
Consistency of the grind is important, too. The finer the grind the more surface area of the grounds is exposed to the water to make the coffee stronger and darker. However, if you use too fine a grind in some methods, coffee grounds could escape into the water. Few things are as “imperfect” as taking a swig of coffee and ending up with a mouth full of grounds! Yech! Basically, you can go with finer grinds for methods that use a paper filter or collect them like egg coffee. Coarser grounds work better in systems that use strainers or mechanical devices like percolating or French Pressing.
Fresh Ground vs Pre-ground
If you’re really a coffee snob, you’ll want fresh ground beans even when camping and several companies make battery-operated grinders that make this perfectly doable. However, grinding your beans at home and bringing them to camp – or buying pre-ground coffee at the grocery store or campground convenience store is what most people do for camping. It will be just fine, and if you try egg coffee, it will be downright delicious!
Brand/Type of Coffee
Again, this is totally subjective and entirely up to you. Buy and use whatever brand you like and whatever your budget will bear. However, if you want to try something special and truly authentic when it comes to brewing Cowboy Coffee, go online and splurge on a pound of Arbuckles’ Ariosa Coffee. They lay claim to being the “Coffee That Won The West.” Just after the Civil War, the Arbuckle brothers came up with the idea of selling pre-roasted coffee beans in 1-pound packages. Arbuckles’ Ariosa Blend became so popular in the Old West, most cowboys didn’t even know there was anything else.
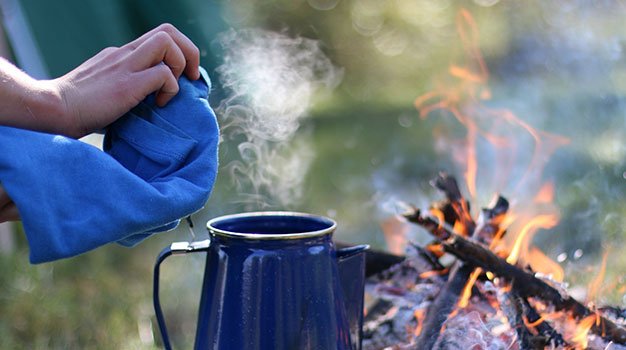
Cowboy Coffee
Cowboy Coffee combines four basic elements of all coffee making: ground coffee, water, a pot in which to heat the water, and heat. While the components are simple, making it is a bit more complicated.
- Recipe type: Coffee
- Cuisine: Camp Cooking
Ingredients
- Large coffee pot or kettle
- 2 tablespoons finely ground coffee per 8 ounces of water
- Water (fresh spring water if you’ve got it)
- Heat source
Instructions
- Using fresh water, bring water to a boil inside a pot.
- Add two tablespoons of finely ground coffee to the pot for every 8 ounces of water.
- Stir the coffee grounds into the water, and then let it sit for two minutes.
- Stir the water again and then let it sit for another two minutes.
- Sprinkle half a cup of cold water onto the floating hot coffee grounds, so they sink.
- Gently pour out the coffee so the grounds remain near the bottom of the pot and what you get in your cup is rich, delicious coffee.
Minnesota North Woods Egg Coffee
Not to be confused with Cowboy Coffee, Egg Coffee is the practice of mixing an egg – including shells — with the coffee grounds. Objectively, it’s kinda gross because you pour a slurry of beaten egg, pulverized egg shells, and the clumpy grounds of medium to coarse coffee grounds into a pot of boiling water. But it’s also some of the best-tasting coffee you’ll ever drink. It’s more of a north woods tradition with a Scandinavian heritage.
Egg coffee was born of necessity. The miners in northern Minnesota were working with irony water and old weak coffee. But somehow the addition of the eggs makes it all come together. To this day, you can find coffee made this way in country church basements across Minnesota. Egg coffee works great for camping, too. It’s slower than a drip cone or French press, but the taste is worth the wait. Besides camping is supposed to be about slowing down anyway.
- Recipe type: Coffee
- Cuisine: Camp Cooking
- Serves: 8 cups of coffee
Ingredients
- 1 large egg, beaten (reserve eggshell)
- Large coffee pot or saucepan
- 8-9 cups of water, plus ¼ cup water, plus 1 cup cold water
- ¾ cup medium grind coffee (Pre-ground, grocery store coffee works just fine.)
Instructions
- Crack an egg. Reserve shell. Place yolk and white in bowl. Beat thoroughly.
- Crush the eggshell into small pieces.
- Add the crushed shell, ¼ cup of water and ¾ cup of medium-ground coffee to the beaten egg.
- Stir together well. (Yech!)
- Bring 8-9 cups of water to boil in a saucepan or coffee pot.
- Carefully pour/spoon in the slurry and boil gently for three minutes. The grounds and egg will create a mass floating on top of the pot.
- Remove from heat and gently pour in a cup of cold water.
- Let sit for 10 minutes.
- Carefully pour into cups and drink. Chances are it will be a lighter color than the coffee you’re used to drinking, but all the rich flavor is there without any bitterness.
Percolated Coffee
Drip and press coffee-making systems have taken over the world, but for a long time, percolating coffee was the most common way to make it – especially when camping. It takes longer than making drip coffee and you don’t have the grounds all bound up in a paper filter for easy disposal. Yet there is an appeal to tradition. Few moments of a camping day are as enjoyable as zipping back into your sleeping bag and listening to the perk of coffee on the cook stove or campfire. Just like an old-fashioned, corded countertop telephone, it’s entirely possible there are people who have never seen or experienced a percolating coffee pot.
A percolating coffee pot is a tall pot, usually with a glass bulb atop the metal lid. Inside there’s a strainer basket suspended on the top of a hollow metal stem. It’s held upright by a slightly domed metal base. You put the ground coffee in the strainer basket and cover it with the strainer top. This whole contraption fits in the pot you’ve partially filled with water. Then you snap the coffee pot lid in place and put the pot on the stove to come to a boil. When the water begins to boil, you’ll see it bubble into that glass bulb on top and you’ll begin to hear the “perking” sound. You then turn down the heat to just keep the percolation going at a slow rate.
Inside the pot, boiling water and steam is forced up the center stem and out its top. It splashes onto the strainer and filters down through the coffee grounds and back into the water. The repeated process makes stronger and stronger coffee the longer it percolates. When you go to REI or Cabela’s to buy a camping coffee pot, alongside the French presses and collapsible drip cones, you’ll find old-fashioned percolator pots. They are nostalgic and make some darn good coffee – especially if you like it strong.
Percolating perfect coffee is a learned skill. It takes some practice, but once you get it down, you’ll love the caffeinated results!
- Recipe type: Coffee
- Cuisine: Camp Cooking
Ingredients
- Percolating coffee pot with strainer, stem, and bulb.
- Fresh water
- 2 tablespoons regular grind coffee for every 8 ounces water in the pot
Instructions
- Fill the pot with enough water so it’s just below the level of the bottom of the strainer basket.
- Place the strainer on its stem into the pot.
- Place two heaping tablespoons of regular grind coffee into the strainer basket for each cup of water in the pot.
- Put the top on the strainer basket, and then the lid on the pot.
- Set on the heat and wait for it to boil. Watch and listen carefully, because it can boil over easily.
- When it’s boiling, move the pot to the edge of the fire or turn down the heat to low.
- Allow the coffee to percolate slowly for at least 5-10 minutes. Remember the longer you percolate it, the stronger the coffee will be.
Drip Cone Coffee / Kuju Coffee Pour Overs
Drip coffee is the most common way to make coffee at home or at the coffee shop (We’re not talking espresso drinks – we’re talking plain old cup o’ joe.) Hot water is poured or dripped over finely ground coffee beans held in a filter. It passes through the grounds grabbing flavor and color as it goes. It drips out the bottom of the filter (and the cone holding it) into a pot or directly into a cup. Coffee making doesn’t get much simpler or more delicious than that. And the beauty is it’s so easily adaptable for camping. In fact, KUJU Coffee takes the process to a new level with its Pocket Pourovers. The individually packaged, one-cup filter cones you simply open, support on the sides of the cup, and pour hot water through. Available in a wide range of blends, all KUJU Coffee is ethically sourced, and one percent of each purchase is donated to the National Parks.
- Recipe type: Coffee
- Cuisine: Camp Cooking
Ingredients
- 1 KUJU Coffee Pour over packet per 8-12 ounces of water
- Water, just below boiling point
Instructions
- Open the packet and pull the filter out of the pouch. Tear along the perforation at the top of filter.
- With the wings that pull out from the sides of the filter, secure to any size mug.
- Pour water that’s just below a boil into the coffee grounds, allow it to drip into the cup. Repeat until 8 ounces is brewed.
- In smaller mugs, it’s okay if the filter rests in the brewed coffee, and this can actually boost the flavor.
- Remove and dispose of filter/coffee – ENJOY!
Camping French Press Coffee
The French Press method of coffee brewing is renowned for making rich, full-bodied, delicious coffee. It may seem a little fru-fru for a camping trip, but that’s not the case anymore. GSI Outdoor created the JavaPress, especially for rugged use in the great outdoors, but it serves as well at home to make your coffee for the morning commute. Actually, French Pressing is another take on Cowboy Coffee. But instead of using cold water to pull the grounds to the bottom, in French Pressing the grounds are collected and held against the bottom by a filter disc you press through the coffee with a plunger. Then you pour out the grounds-free coffee from above the filter.
- Recipe type: Coffee
- Cuisine: Camp Cooking
- Serves: Up to 30 ounces
Ingredients
- GSI Outdoors 30 ounces JavaPress
- Up to 30 ounces water, just below boiling (200F is perfect)
- 2 tablespoons of coarsely ground coffee per 6 ounces of water
Instructions
- Begin by boiling some water in a separate pot.
- Pour a couple of ounces into the JavaPress cylinder and swirl to warm the container. Return water to boiling pot.
- Measure 2 tablespoons of coarsely ground coffee per six ounces of water into the cylinder. If you’re making the full 30-ounce capacity of the JavaPress, that would be 10 tablespoons.
- Add water that’s cooled just below boiling to the cylinder.
- Place the lid/press in position on top of the cylinder and make sure it’s seated well.
- Allow the coffee to steep for 4-5 minutes.
- Slowly press down the plunger to the bottom of the pot.
- Turn the arrow on the lid to align with the pour spout and pour the coffee into your waiting mug.
Homemade Camping Coffee Bags
Coffee bags take the concept of Cowboy Coffee, and just make it a lot easier to ensure you don’t end up with a mouthful of grounds to spoil a delicious cup of java. You can make up as many of these as you’d like at home ahead of your camping trip and have them ready for quick coffee brewing any time. FYI – if you really want to take the easy way out, companies like Folgers and others make single-serving coffee bags that are just like tea bags. So, buy a box and submerge two bags in near-boiling water to make 16 ounces of coffee.
- Serves: 16 ounces coffee per bag
Ingredients
- Dental floss or cotton twine
- #4 paper coffee filters
- 4 tablespoons of drip ground coffee for each bag you want to make up for a 16-ounce cup of coffee
Instructions
- Cut some 8-inch lengths of cotton twine or dental floss. You’ll need one for each bag you’re going to make.
- Flatten out a drip coffee filter on the table in front of you.
- Scoop 2 tablespoons of coffee into the center of the filter for every 8 ounces you want the back to brew. We like to make 16-ounce batches, so that’s 4 heaping tablespoons of fine-ground coffee.
- Carefully gather up the sides of the filter and pull them together to form a pouch.
- Give this top a good twist so the packet resembles an onion pulled from the ground.
- Use the pre-cut string to tightly tie off the top of the pouch.
- When it’s time to make coffee, heat water to boiling, then remove it from the heat for 30 seconds to a minute.
- Pour into the cup and plop in a pre-tied bag.
- Wait about five minutes, jostling the cup occasionally.
- Remove the coffee bag and enjoy.
What’s your process for making coffee? Tell us in the comments below.
Source: https://outdoors.com/6-great-ways-to-make-camping-coffee/