Cooler Hacks: Six Upgrades for Your No-Frills Cooler
If you can’t bring yourself to spend hundreds of dollars on a cooler, you’ll get no quarrel from us. However, there is something to be said about expensive coolers. They’re often expensive because they come with useful features and deliver a top-notch performance. But still, if you can’t get over the price or you want a nifty project, here are six cooler hacks to upgrade your no-frills cooler
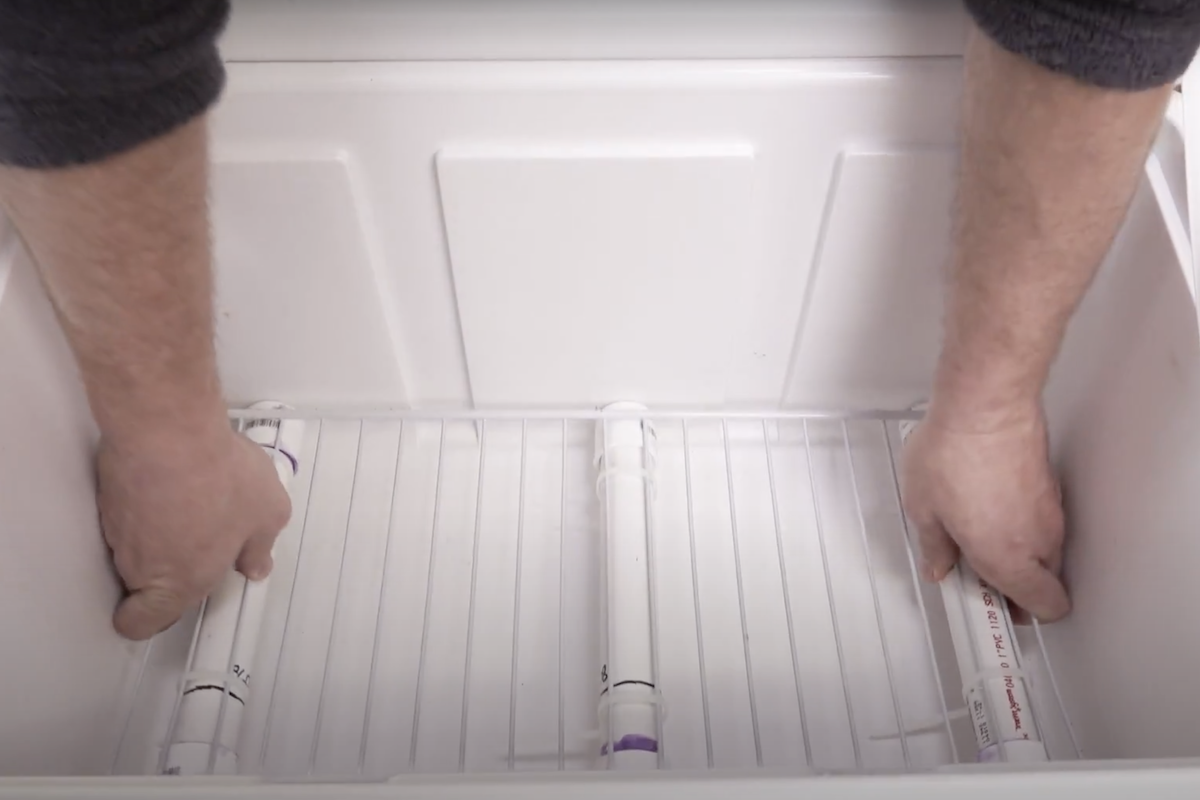
Super Polar Bear Tubes
A polar bear tube is an easy way to keep your cooler extra cool and for longer. The easiest way to make one is to: Size a PVC pipe (preferably 1.5 to 2-inch thick pipe) to your cooler; fill the pipe about three-fourths full of water, or about 80 percent; and cap the ends with watertight fittings (use rubber cement for sealant).
Also, here’s an additional cooler hack: to help make the polar tube even colder, use salt water instead of fresh water. Because salt water freezes at a colder temperature, it’ll last longer. Just know that when you mix the salt in the water, you should use about half a cup of salt for every gallon of water.
Install Non-Slip Feet
When you throw an average cooler into the bed of a pickup truck or on the wet deck of a boat, it slides all over the place. It gets banged up and wrecks stuff around it. Heaven forbid, you should want to stand on it to get a better view of — whatever. A few large anti-skid pads strategically placed on the bottom of the cooler quickly eliminate all those problems.
To ensure good adhesion to the plastic, if the surface is rough smooth with some sandpaper or emery cloth. Then use rubbing alcohol to clean off the places where you intend to attach the pads.
Build a False Bottom
Those Super Polar Bear tubes you made in Hack #1? Another great use for a couple of them is to support a false bottom in your cooler. That way if you use regular ice in addition to the tubes or any of the frozen food thaws, runoff drains to the bottom of the cooler but the contents stay high and dry above it.
Making a false bottom is so easy! Get a length of that white, coated wire shelf material. Cut it down so it fits in the bottom of the cooler, zip-tie two or three polar bear tubes between the wires, and lay the system in the bottom of the cooler. Voila! You’re done. No more nasty melt water and who-knows-what-else slurry contaminating your camping food.
Add a Second ‘Lid’
The best thing you can do to preserve ice and keep everything colder is to put an added layer of insulation at the top. A couple of custom-cut pieces of foam insulation work well, but even better is a flexible foam pad (like the backing on the mouse pad) that can lay over the top. Then when you open the cooler you up only the end of the pad you need to access what you’re after.
The more insulation, the better. Take whatever material you decide to use for your cooler pad and cut it to size so it fits snugly just at the top of the cooler. If you go for two layers, cut the inner layer in half and glue it to the single top layer. This makes a “hinged” lid so you only expose half the contents to that nasty warm air when you open it.
Install a Bottle Opener
The expensive roto-molded coolers offer accessories like built-in bottle openers. Is that worth paying for? We simply tie a zip tie to an old-fashioned church key to the cooler’s handle. Total cost: maybe a dollar. Always having a bottle-opener at the ready: PRICELESS.
Add a Seal
Inexpensive coolers seldom have rubber seals between the top edge and the lid. You can make one for next to nothing with some foamy double-stick mounting tape. Use the super sticky kind made for outdoor surfaces.
Clean the surface of the cooler’s top edge where it contacts the lid with rubbing alcohol, then make sure it’s good and dry. Apply the sticky side of the tape to this surface. Try to do each of the four sides with a continuous length of tape. Trim for width as necessary.
You can either leave the peel-off coating in place on the exposed side of the tape or if you’re seeking a bit of a sticky seal, peel it off and LIGHTLY coat the now sticky surface with baby powder or talcum.
When the tape eventually comes off, it’s easy to replace with new, but it adds a seal your inexpensive cooler never had before. That means ice lasts longer.
What are your cooler hacks? Tell us in the comments below.